
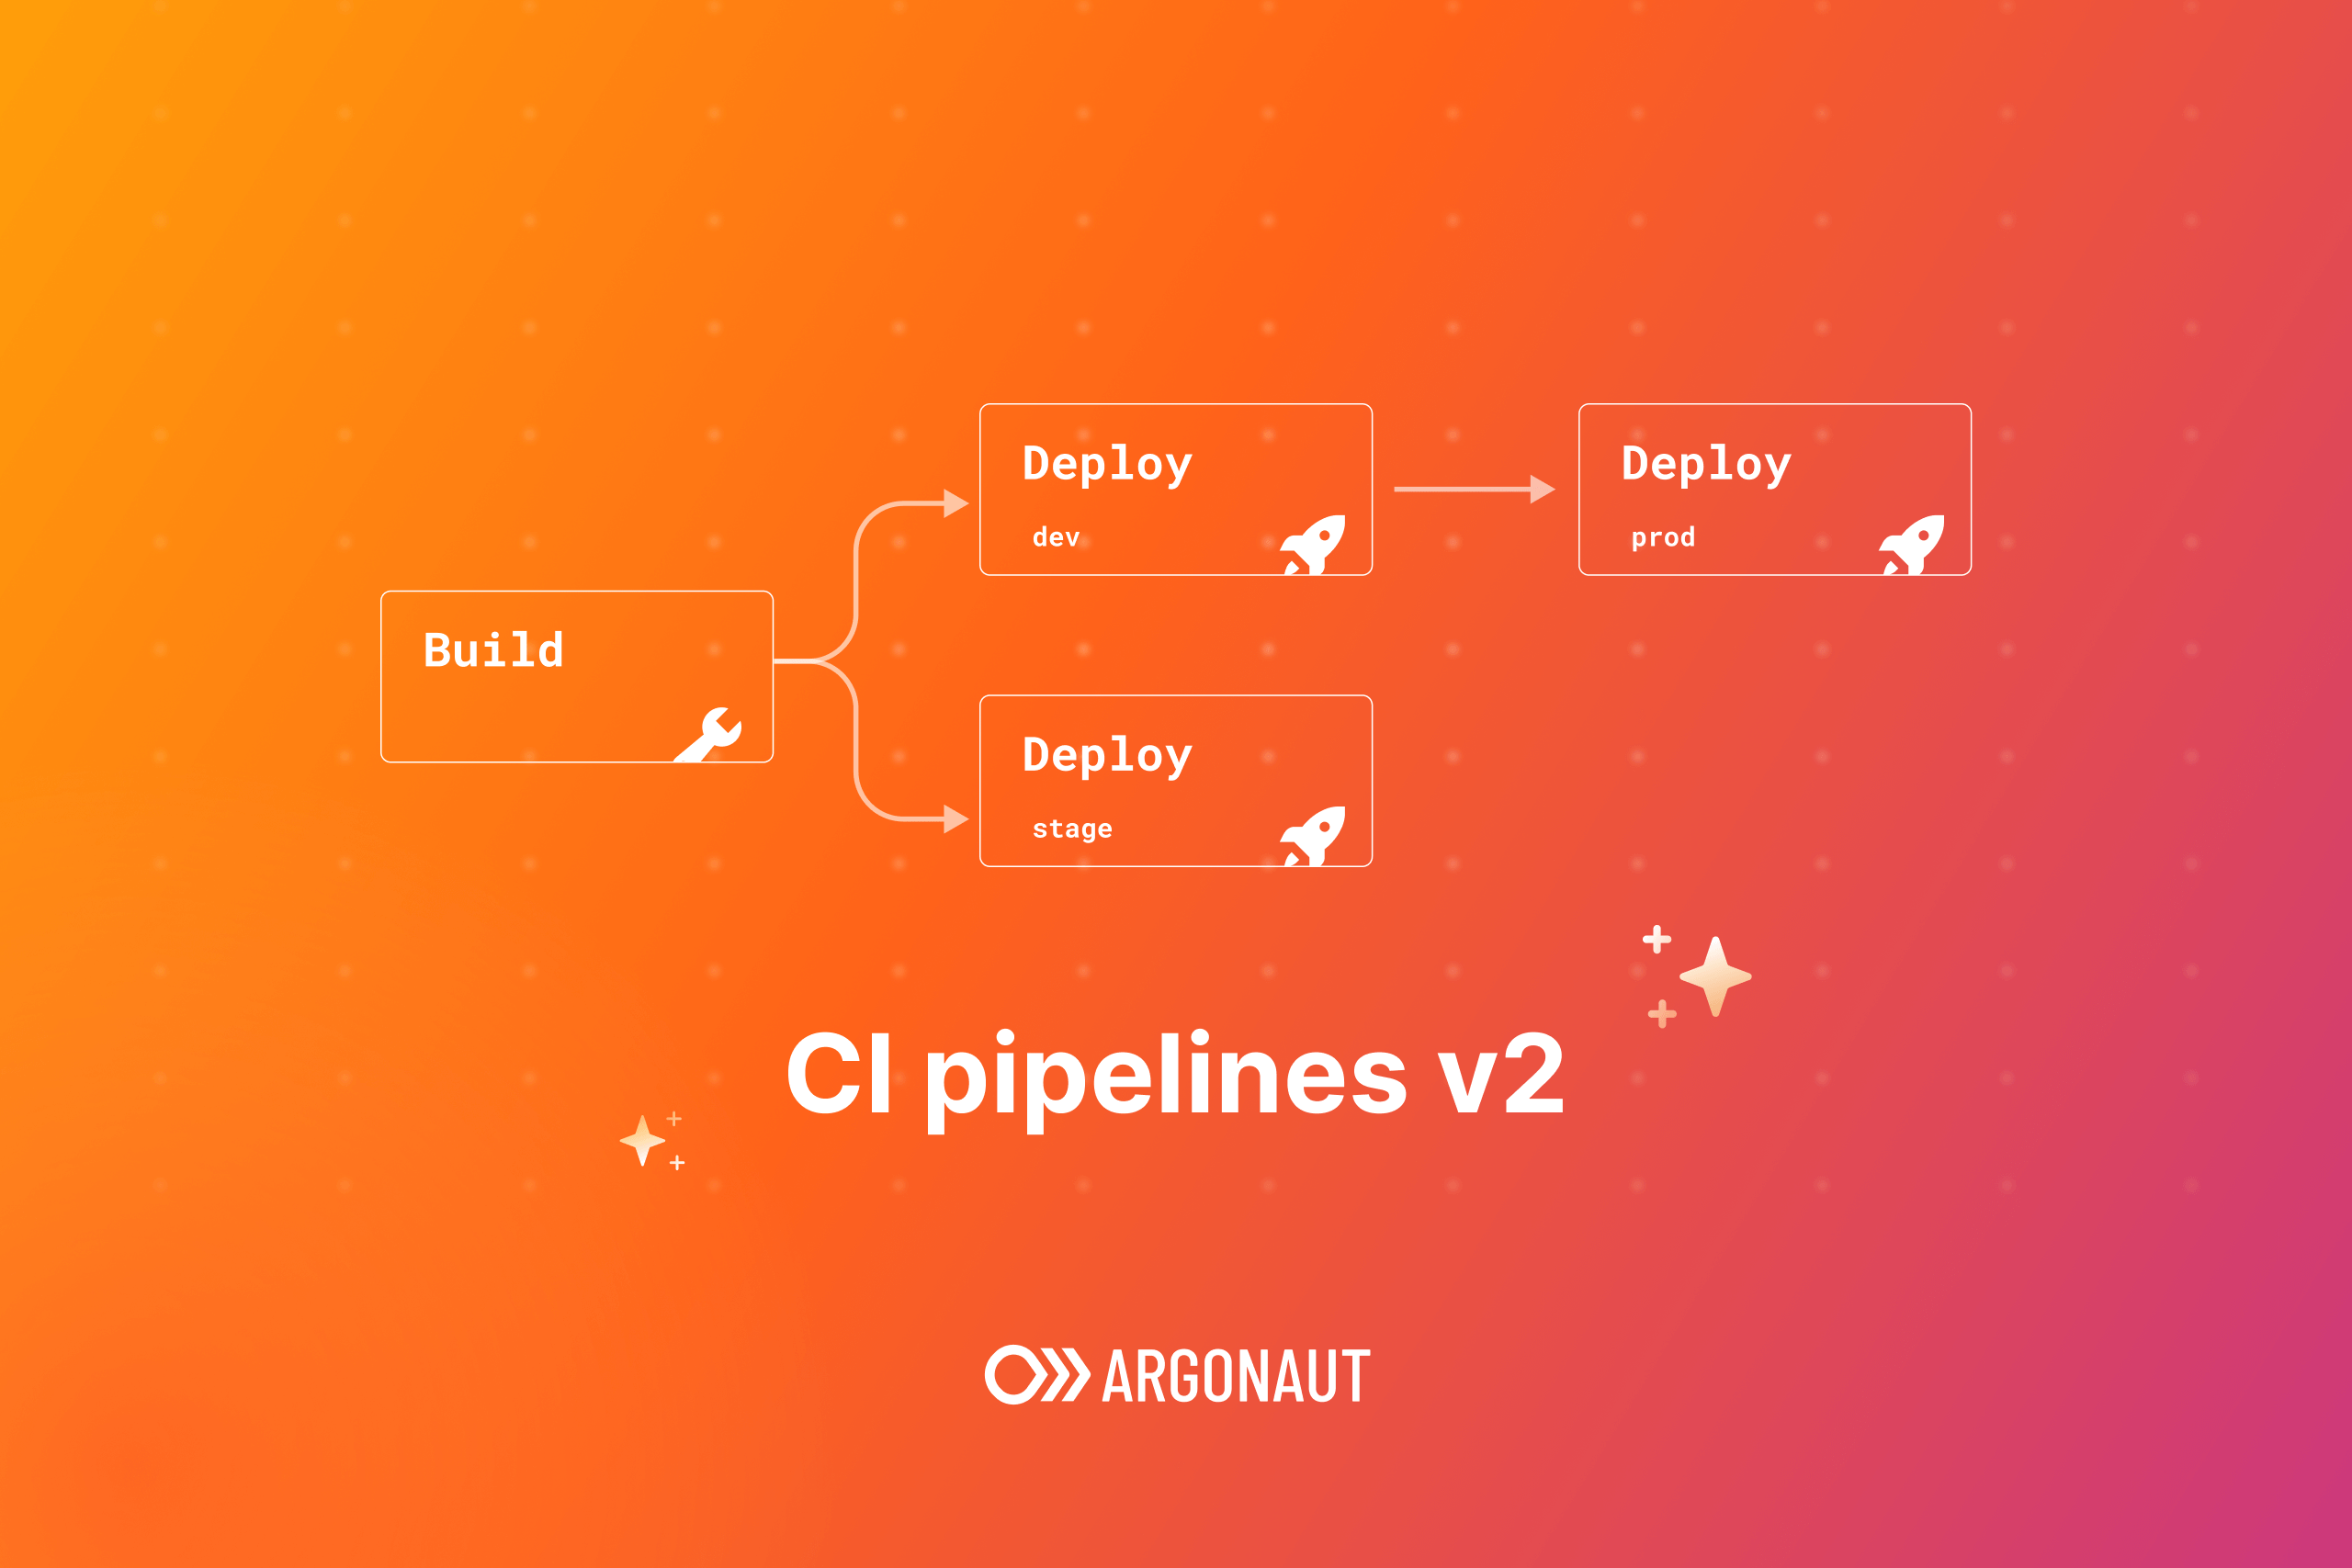
We’re thrilled to introduce version 2 of Argonaut’s CI pipelines. This update brings several changes that enable our users to go beyond 1 build and 1 deploy stage and create more complex deployment flows. In this blog, we will guide you through these changes and show the new components in the create and edit deployments flows.
When you click on the applications from the sidebar, you will see a familiar list of applications and pipelines. However, these screens can now show the states of more than 2 stages for each of your pipelines. This is the status of your pipeline’s latest run.
You’ll see the new screens once you select an existing pipeline or create a new pipeline.
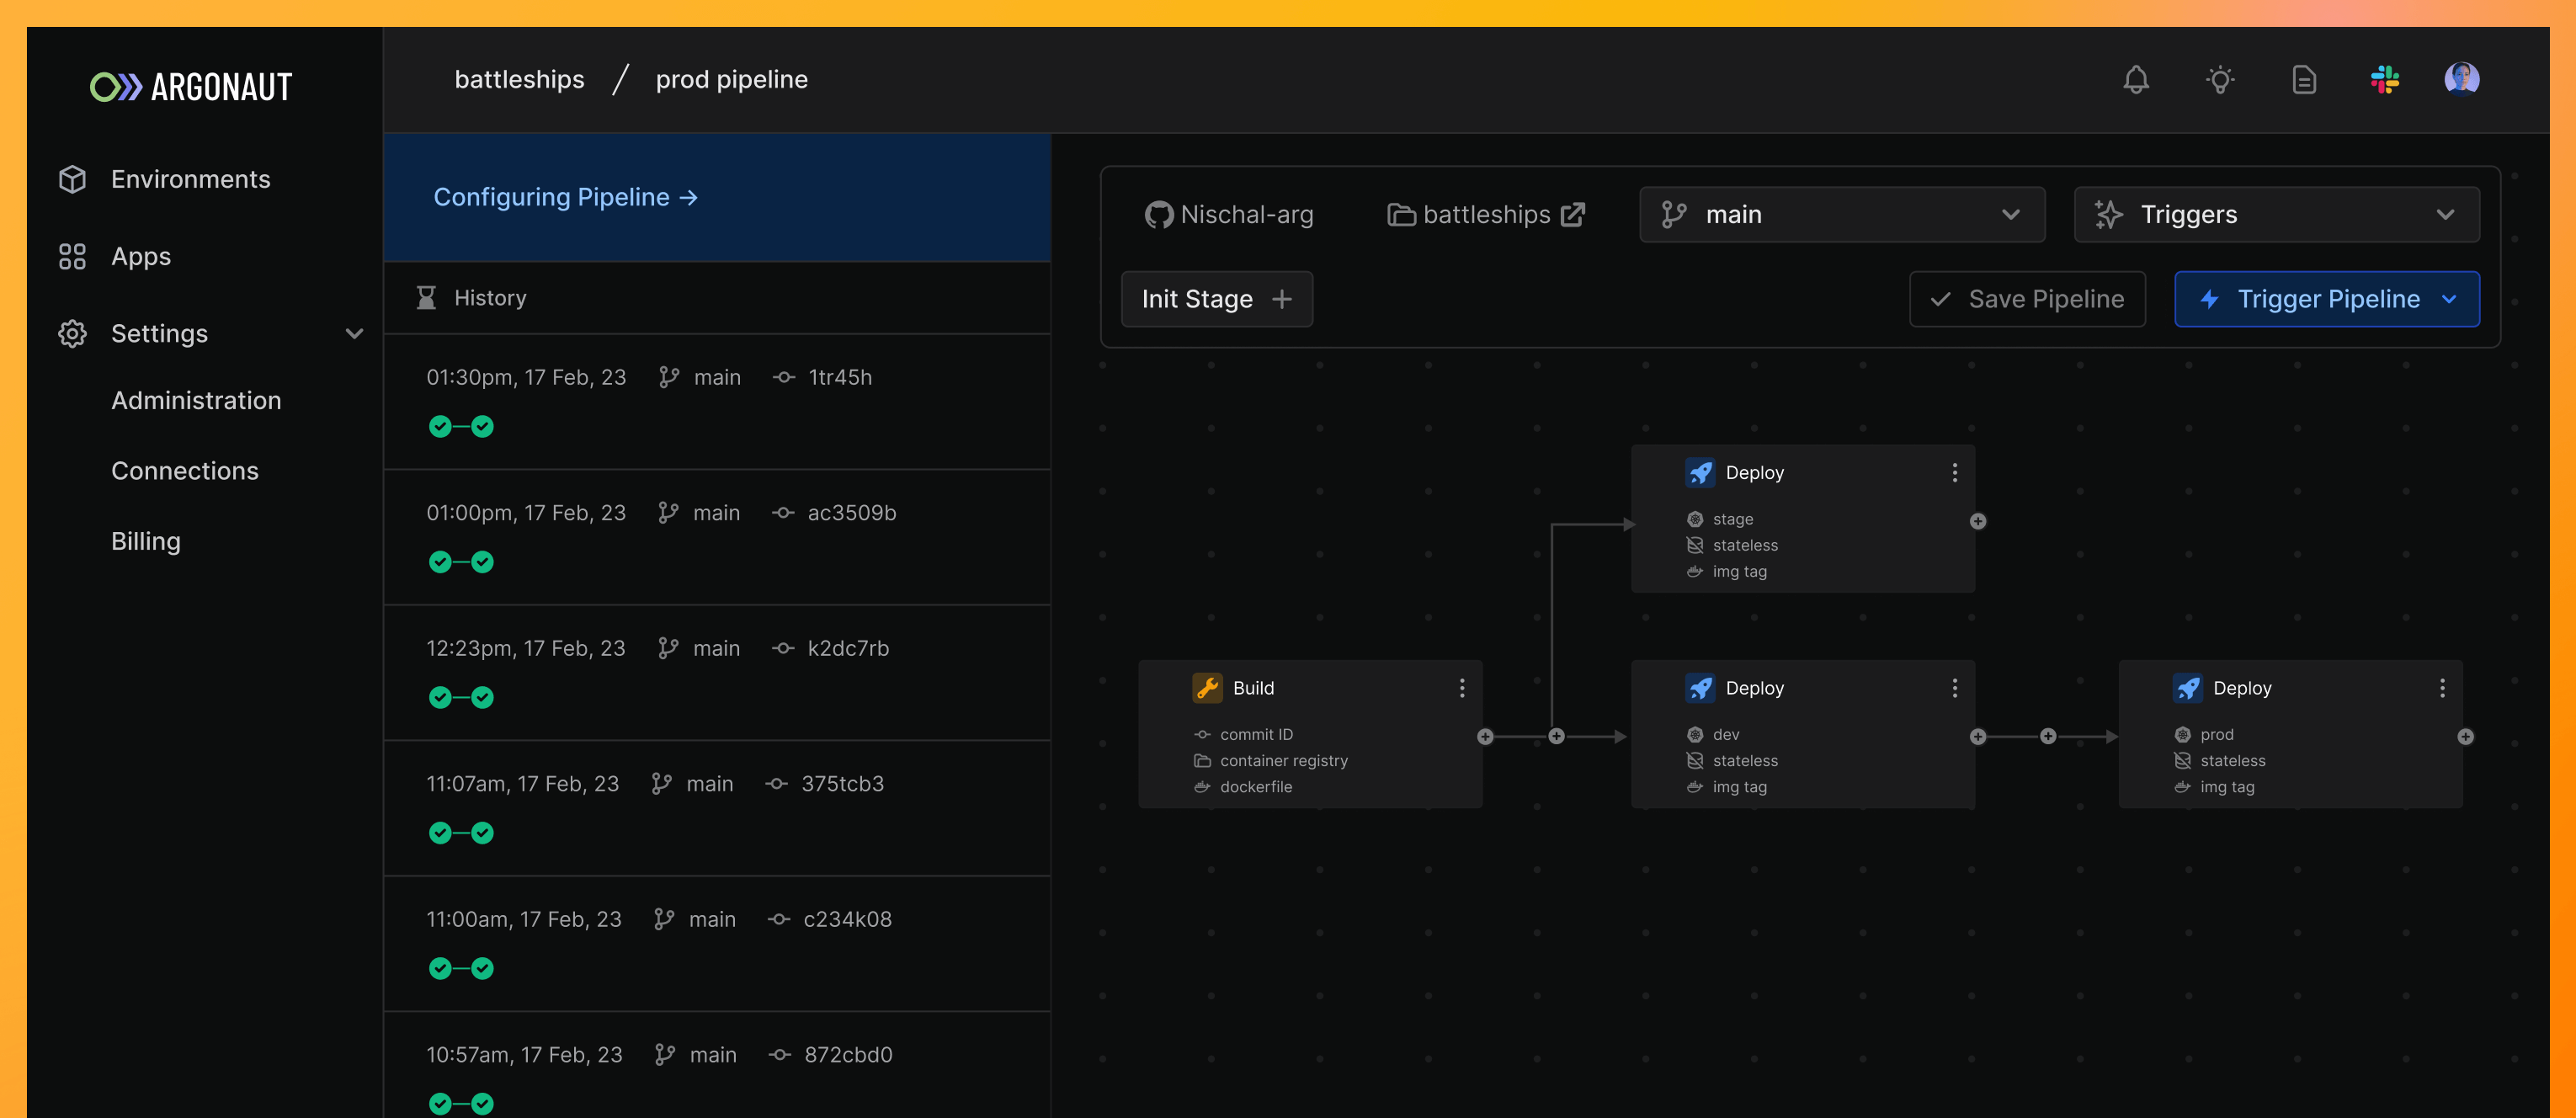
The previous pipeline builder had a Builder tab and a Run History tab.
In the new version, you see the builder view on the right side and the history on the left side of the screen. The History tab shows the latest runs of the selected pipeline. And on the top left, you will see a Configure pipeline button that allows you to customize and add new stages to the pipeline.
Unlocking more deployment possibilities
With the new updates, our UI is also updated to support different combinations stages. This can allow more use cases, some of which are discussed here.

Parallel deployments
These deployments use one build stage and have different deployment stages. Using one build image across deploy stages helps save on costs and create identical copies of your app across environments. An example where such a pipeline can be used would be for deploying an app across different cloud provider regions.
Sequential deployments
These pipelines have one build image and multiple deployment stages. They are arranged in a sequential manner, and the user can also have the option to trigger a deployment manually. An example use case would be to deploy the app first in the pre-prod environment before deploying it to prod.
Deploy without building
Sometimes, you might have a pre-built image in your repo, in such cases, you can go ahead and directly initiate the deploy stage, which deploys the app in your environment. Examples of this could be deploying third-party tools with pre-built images.
Tracking unsaved changes
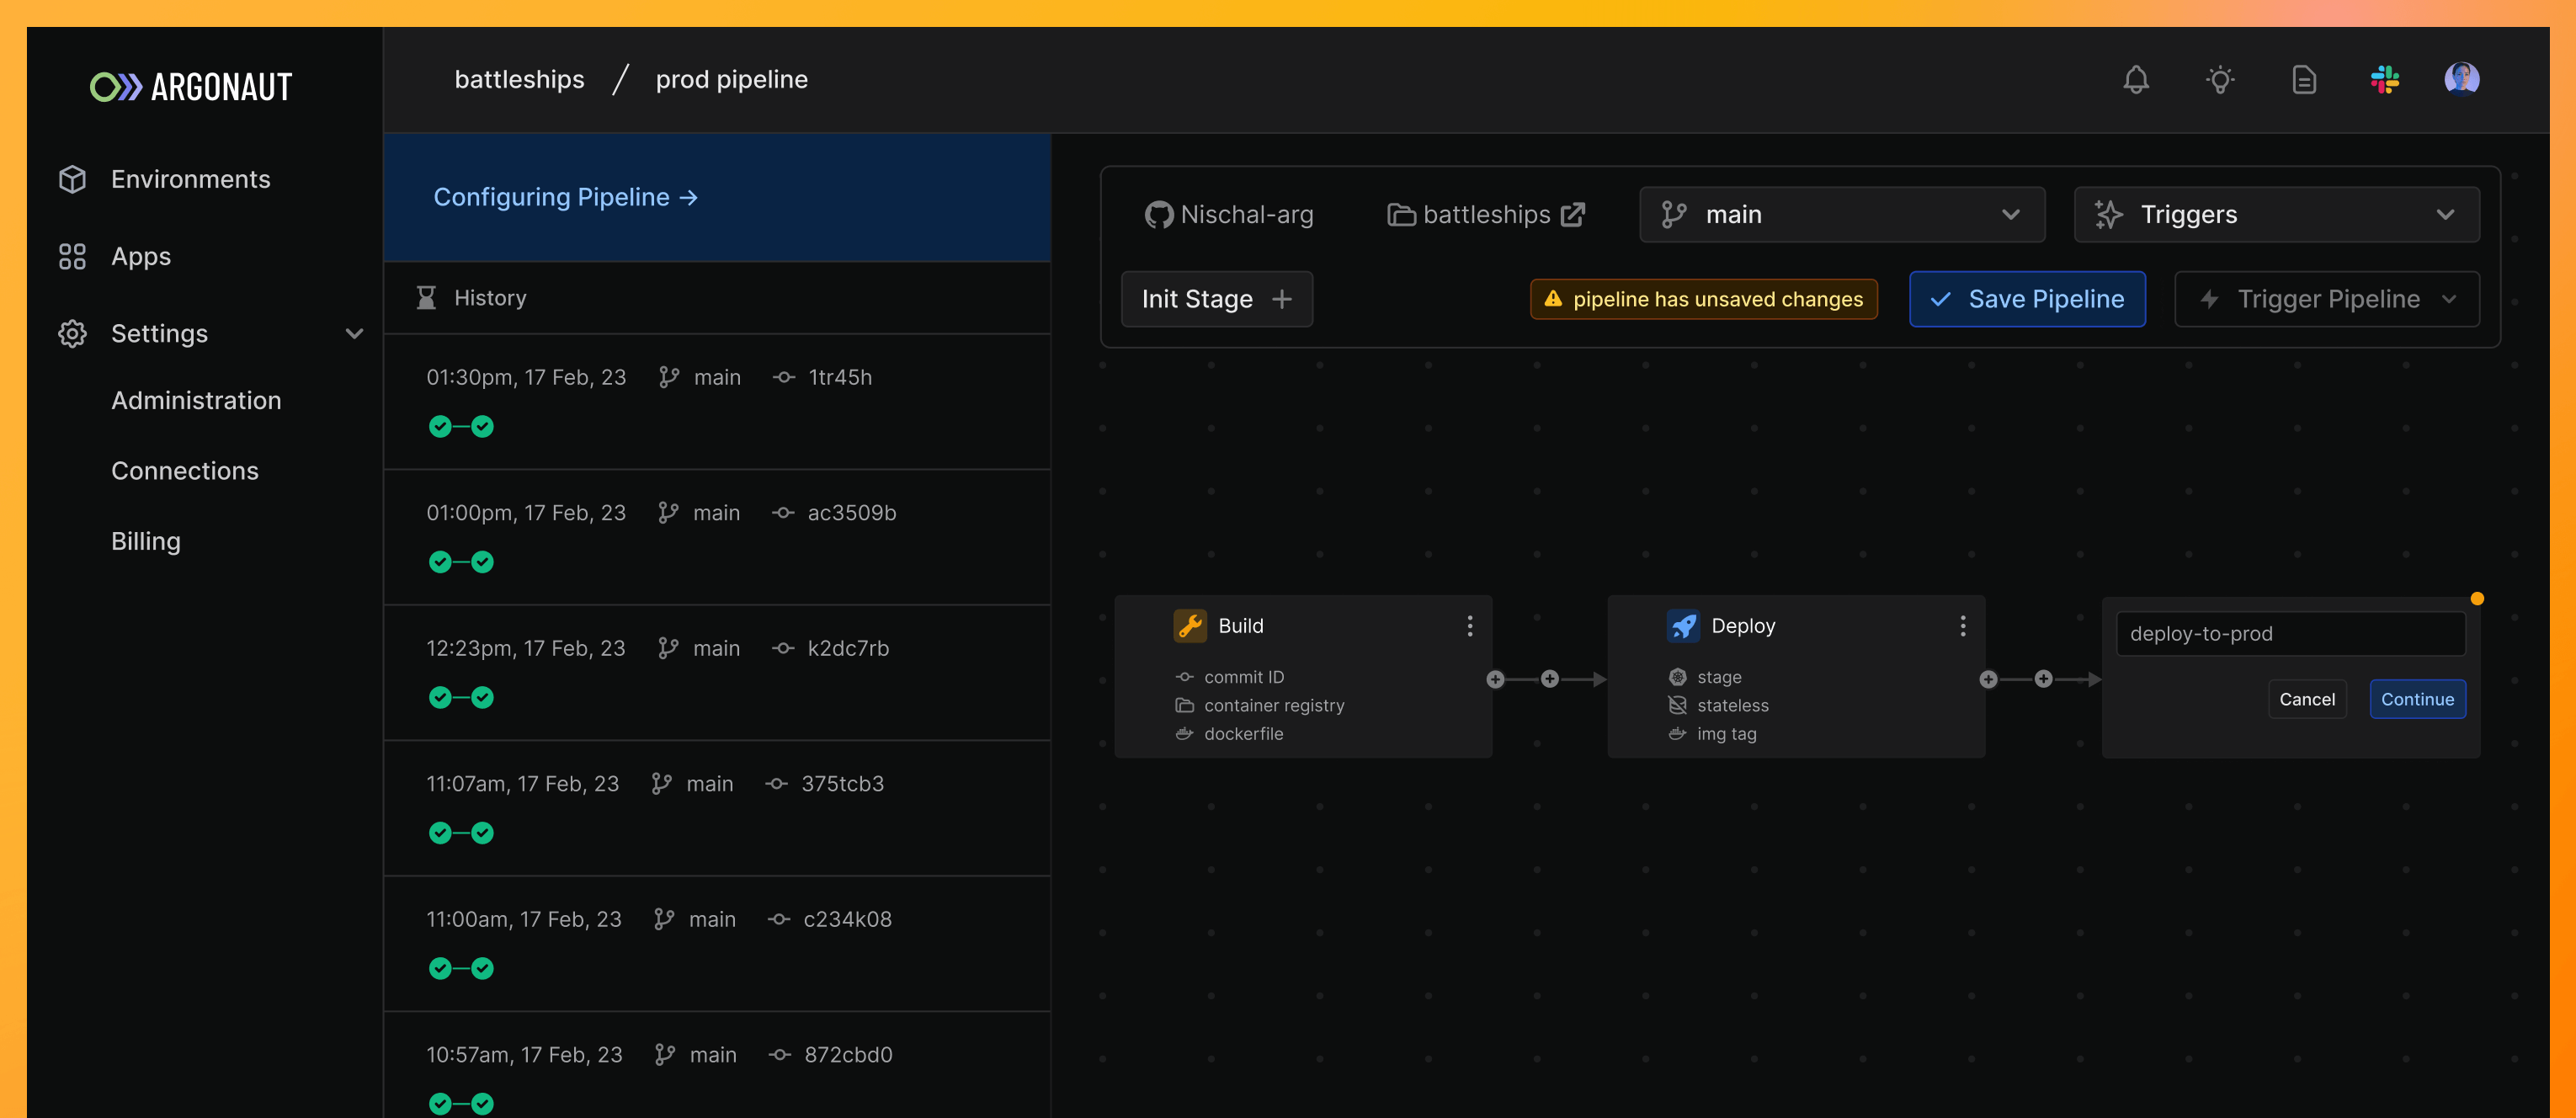
The pipeline builder will now track changes whenever you make a change to the pipeline or to one of the stages in the pipeline. This is done to ensure you don’t lose any unsaved changes to the configurations or pipeline stages.
Whenever a new change is made to the pipeline, you will see a “Pipeline has unsaved changes” alert next to the Save Pipeline button. There is also an additional prompt that pops up when you reload the page or navigate away.
Each pipeline stage also shows an alert if the info populated in that stage isn’t yet saved.
While creating a new stage in the pipeline, you will see an amber dot to indicate unsaved changes in that stage. And only once those stages are saved, can you save the pipeline and trigger the pipeline.

Here are some common user actions that can lead to unsaved changes. Some are on a stage level, while others are on a pipeline level.
| Action | Unsaved changes |
|---|---|
| New stage added | Stage & Pipeline |
| New pipeline | Stage & Pipeline |
| Stage configurations changed | Stage & Pipeline |
| Stage configurations are saved | Pipeline |
| A stage is deleted | Pipeline |
| Git user modified | Pipeline |
| Git repo modified | Pipeline |
| Git branch modified | Pipeline |
| Triggers added/removed | Pipeline |
Pipeline’s run history
On the left side of the screen, you will see the history. This stores records of all your previous pipeline runs, along with time, branch, commit ID, and other useful information. Previously, you could only see the history but not interact with it on a stage level.
Now, we provide a more detailed view of your history in read-only mode. This shows more information about the stages used in that pipeline, along with the configs, env. values, and more!
You can still get more details on the history of specific stages in your latest deployment.
Click on Configure Pipeline and click on your desired stage.
Build stage - You can view the build history of the selected Build stage
Deploy stage - You can view deployment logs, monitoring, as well as the history of the selected Deploy stage
We currently do not have a rollback option. The history tab is only meant to check the previous configs and can be useful to debug failed runs.
New Stage creation flow
By default, each pipeline is created with a build and a deploy stage.
To create a new deploy stage, click on the + icon to the right of any of the existing stages.
- Enter a custom name for the deployment
- Click
Continue - Inside the stage Configs page, make the necessary changes, and click
Save
💡 Note: All deploy stages are automatic by default. To change it to manual deploy, click on the ▶️ button in the Pipeline builder view.
Each pipeline can also have more than one build stage. To create a new build stage, click on Init Stage + on the top bar.
- Enter a custom name for the build stage
- Click
Continue - Inside the stage Configs page, make the necessary changes, and click
Save
Overflow menu for each stage
In each stage, users get access to quick actions for that particular stage. This can be accessed by clicking on the three dots next to the stage’s name. Currently, it only has a delete action. We will be adding more actions in the future.
Deleting a stage
A stage can be deleted by clicking on the three dots to bring up the overlay menu. Then click on delete. This removes the stage and creates a direct connection between the previous and the next stage in the pipeline. Stages, once deleted, cannot be restored.
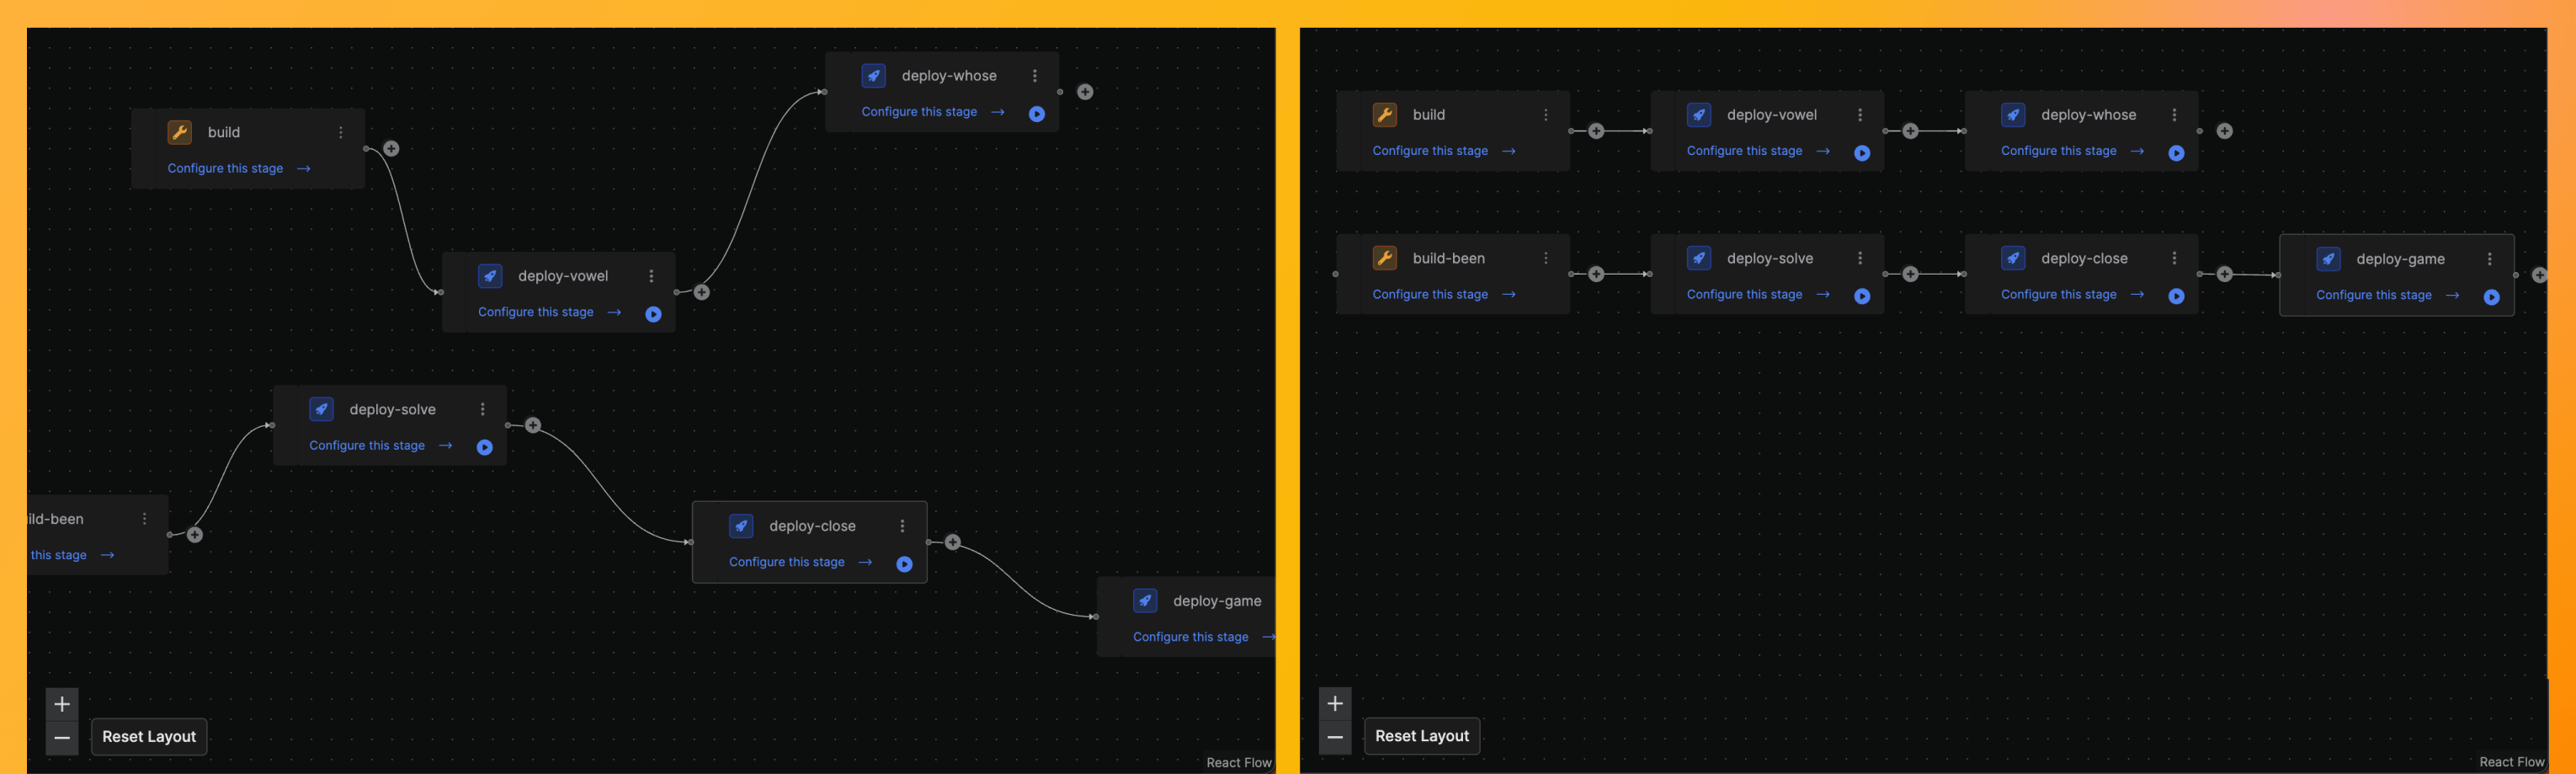
Reset layout button
If you have multiple stages and your pipeline looks messy, you can use the auto-align button to bring your stages in order. Find it in the bottom left of your builder next to the + / - zoom buttons.
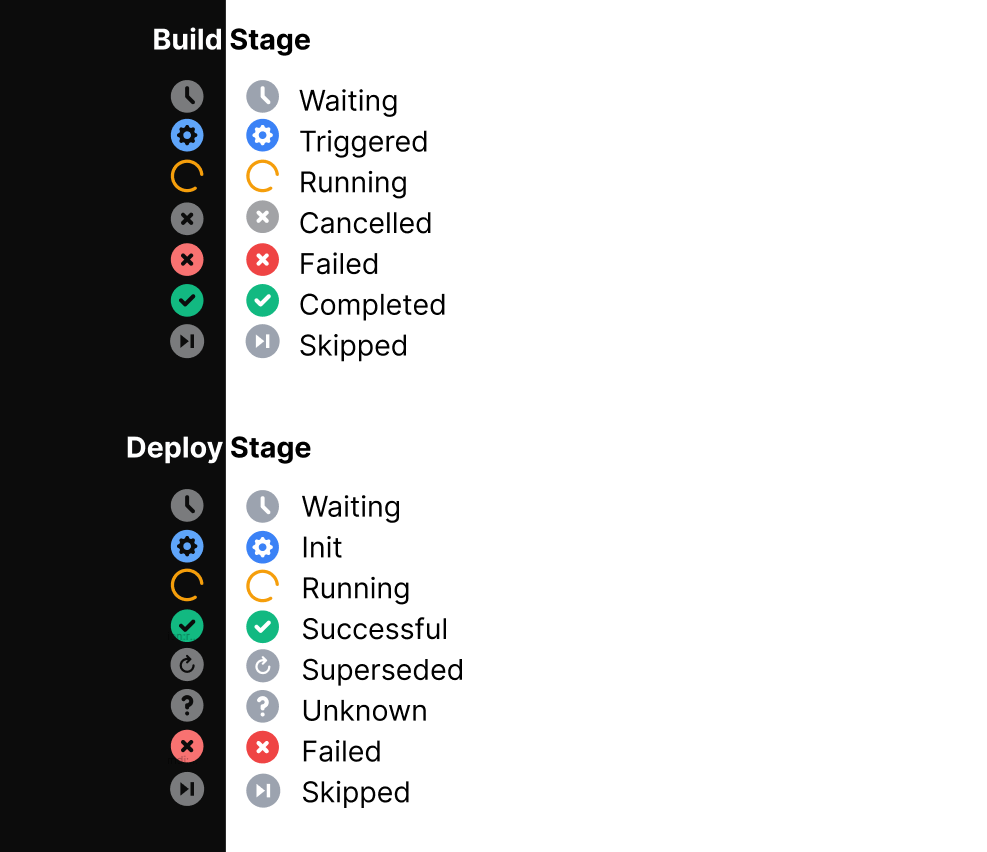
Status indicators
Here’s a reference to the different status indicators of build and deploy stages.
Keep in mind
- Every new pipeline will have just one Git Repo, which cannot be changed later.
- The build stage now has two save options - Commit to Repo and Raise a PR.
- Triggers are useful when you want to deploy only on changes to a specific path in the repo.
- Use the ▶️ / ⏸️ button to switch between automatic and manual deployments.
- Default stage names have been made more readable now; we recommend you rename them while creating, as the name of the stage cannot be changed once they are created.