AWS
This walkthrough is aimed at first-time users of Argonaut. You will automate the deployment of an example application to Kubernetes (EKS) runtime on the AWS cloud using Argonaut.
The pre-requisites for this deployment are:
1. Create an account
If it’s your first time using Argonaut, you must sign up for an account. You will then receive an email with an account activation link. Alternatively, if you already have one, log into your account.
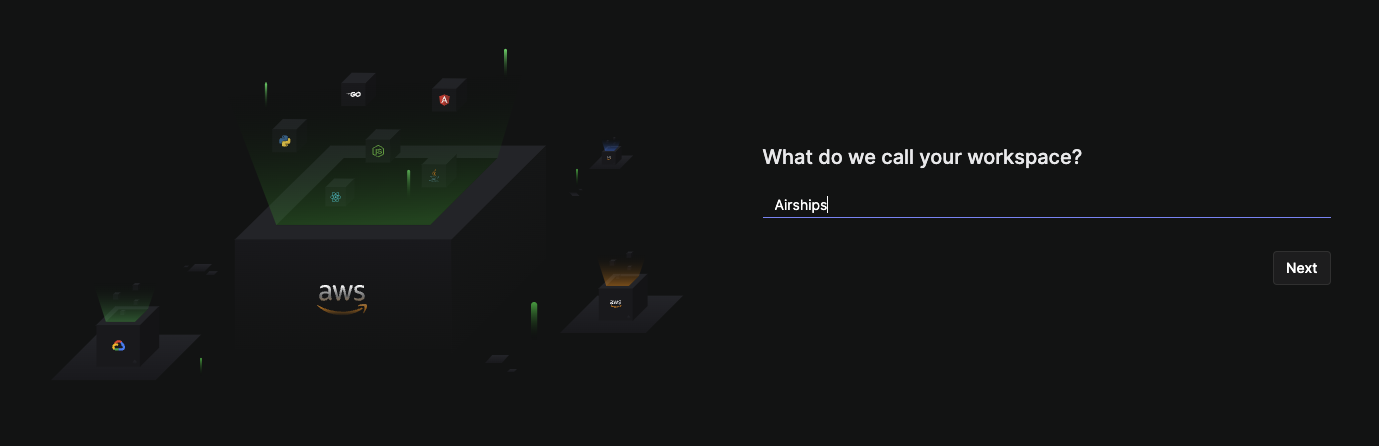
2. Create your workspace
Each Argonaut account needs to be associated with one Argonaut workspace.
- Type in a name for your
Workspace. This CAN be changed later. - Click
Next
3. Connect your AWS account
You will be taken to the Connections page under Settings. Argonaut connects to AWS as an IAM user. Multiple connections to the same AWS account are not allowed.
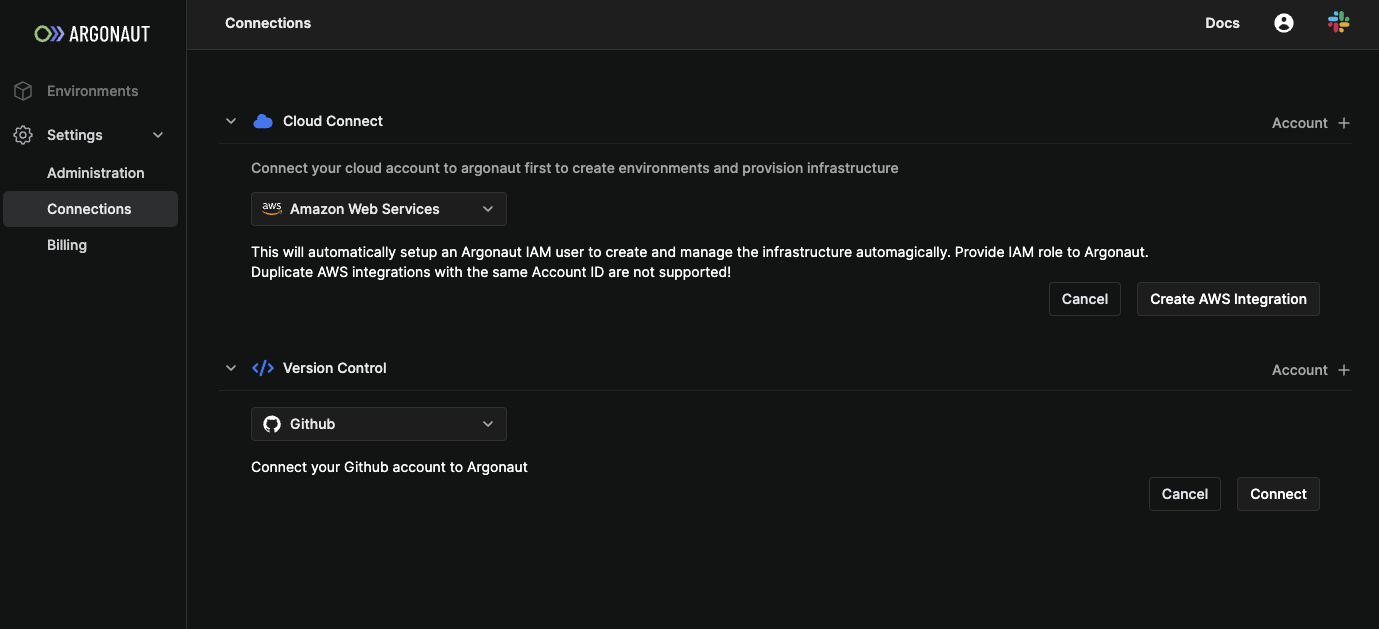
- In the Connect Your Cloud section, select
Account + - Select
Amazon Web Servicesand clickCreate AWS integration - Log into your AWS account, if you aren’t already logged in.
- You’ll be redirected to the AWS CloudFormation's
Create stackpage. - Note that the
Create stackpage is already populated with Argonaut-specific parameters. - Click on the
Create stackbutton. - You should now see the new stack’s page on AWS CloudFormation dashboard.
- Navigate back to
Connectionspage from yourSettings. - Scroll to
Connect Your Cloud—>AWS. - Click
Refresh. - You should see your newly connect AWS account ID.
- Against the AWS account ID, verify that the connection shows as
Successful.
4. Connect your GitHub account
On the same screen, you will see a Version control option. Here, you can connect Argonaut to your GitHub or GitLab repository. For this demo, we use GitHub.
- In the Version Control section, click on
Account + - Choose
GitHub, and click on theConnectbutton. - Click on the GitHub account you’d like to connect with Argonaut. You’ll host your sample application on this account.
- Click on
Installto installArgonautBoton your chosen GitHub account. - Enter your password, and click on
Confirm Password. - On successfully connecting your GitHub account, you’ll be redirected to the
Version Controlpage that shows your GitHub account.
5. Create an AWS environment
Argonaut automatically sets up environments easily in minutes
- Select the
EnvironmentsTab from the sidebar. - Click on
Environment + - Choose Amazon Web Services.
- Give your environment a name
env. - Choose your environment’s region. An environment's region CAN’T be changed later.
- Click on
Create.
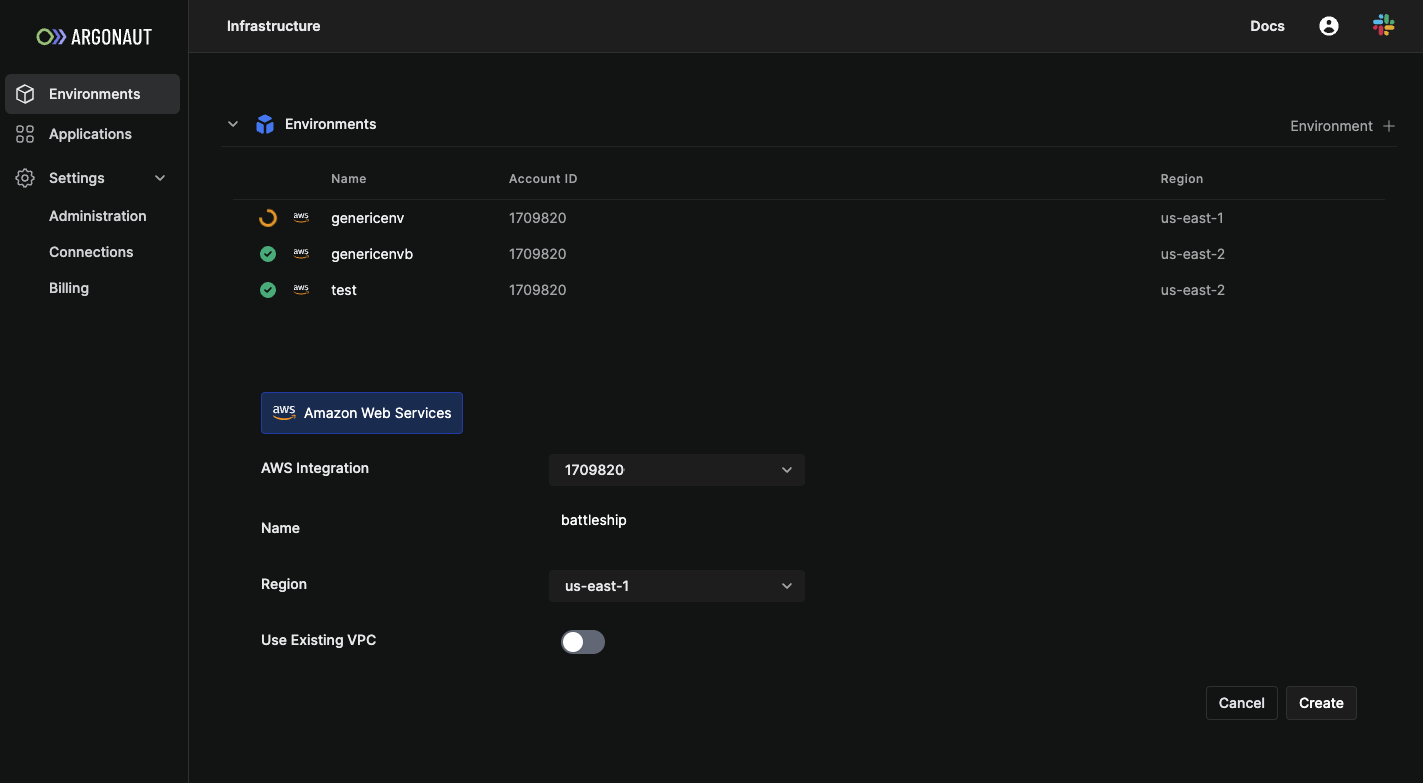
To check if the environment creation was successful, navigate to the environment page from the sidebar, and look for your environment's name in the list. Ready environments have a green check symbol indicating the operational status.
6. Create an EKS cluster
To deploy your application on K8s, you need to first create a K8s cluster:
- Select
Environmentsfrom the sidebar. - Select the newly created
envenvironment. - Select the
Infratab from the top bar. - Click on
Resource + - In the create resource form, Select
EKS. - Input the following values:
- Cluster Name as
dev. - Node group name as
test. - Instance Type
t3.medium. - Instance class as
Spot. - Desired Node Count as
3 - Set Nodes: Min as
3and Max as5. - Set Disk Size as
50.
- Cluster Name as
- Click on
Create EKS.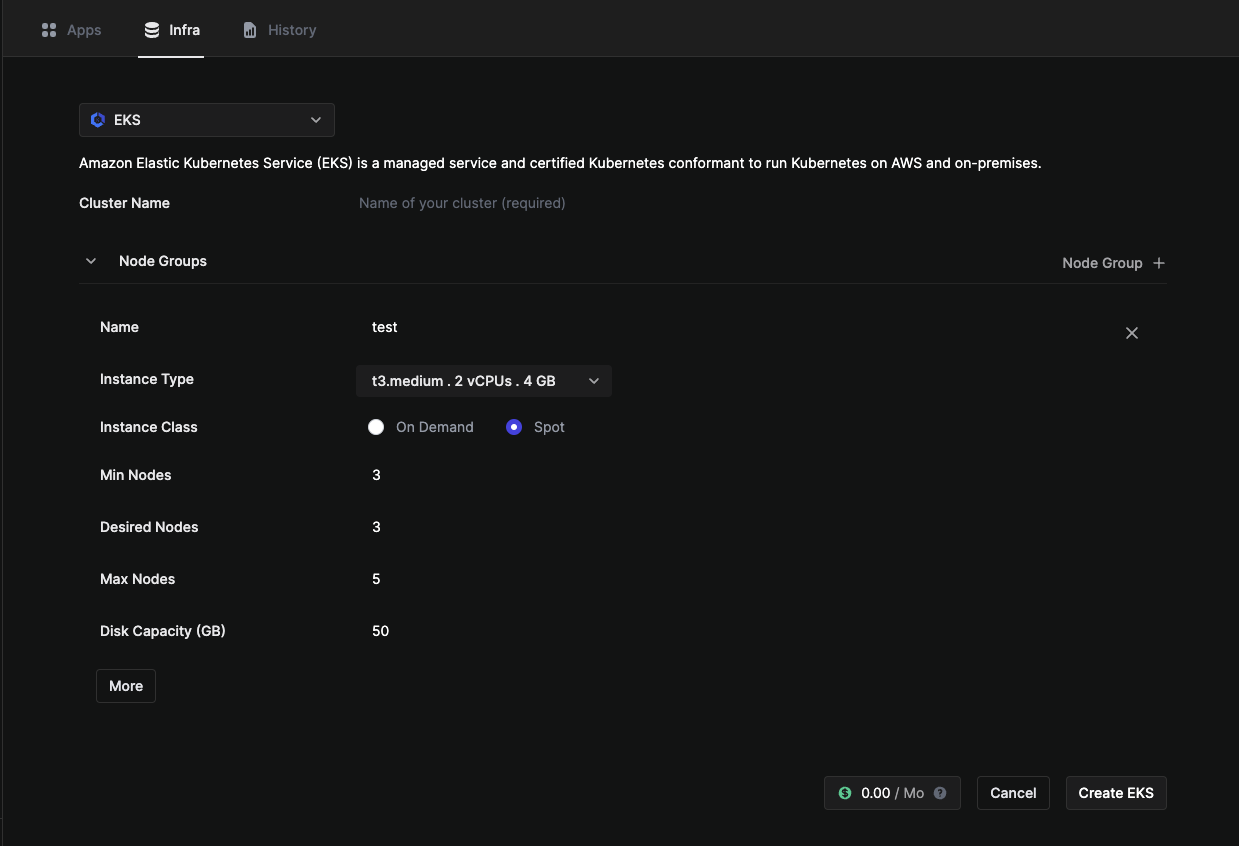
7. Set up automatic deployment
- Fork the battleships repository into your GitHub account - the same account that you’ve connected to in Argonaut. The rest of the steps assume that the name of the forked repository is also
battleships. - On your Argonaut dashboard, click on
Applicationson your sidebar. - Click
Application +on the top right.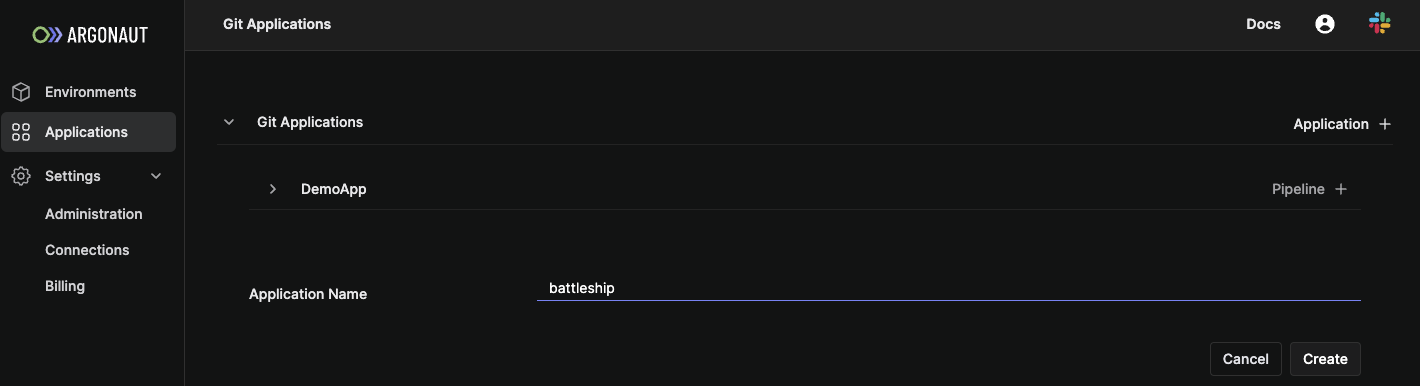
- Give it an application name,
Battleship. - In the
Battleshipapplication, selectPipeline + - This takes you to our interactive deployment builder step. Here you will set the two stages of deployment - Build and Deploy stage.
- Enter a pipeline name as
Test Pipeline. - Select your
Git account,battleshipsrepository, andmainbranch. - Build stage. You can access this by selecting the Build stage.
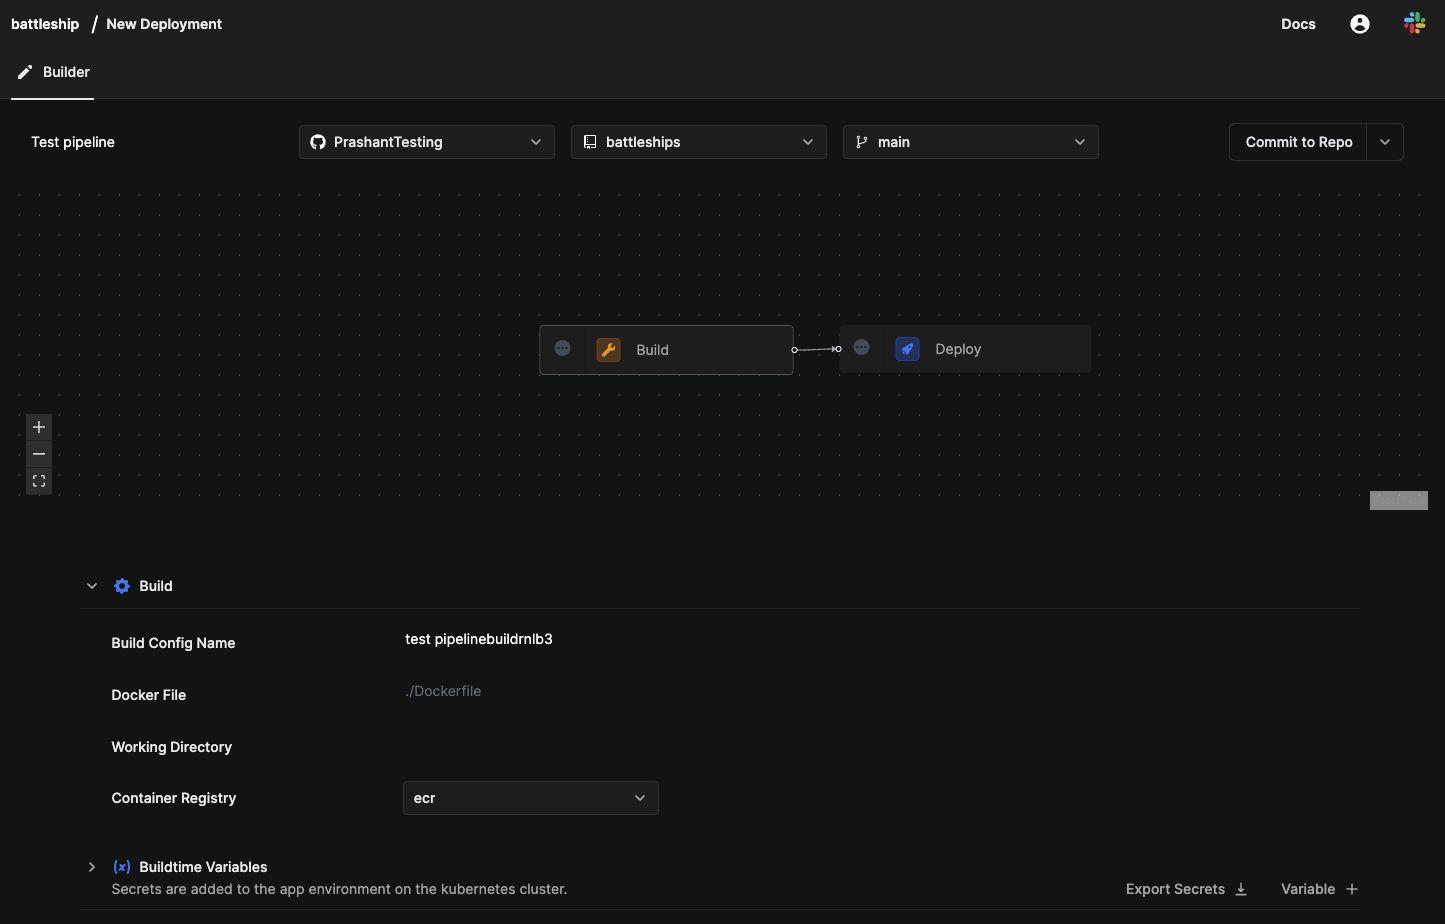
- Set Build Config name as
firstbuild - In Path, fill ./Dockerfile.
- Set Build Config name as
- Deploy Stage. Select the Deploy stage.
- Set
Service TypeasStateless. - Ensure the correct environment and kubernetes cluster is chosen.
- Under
Network Services, clickAdd Service.- Fill your
Hostname. - Fill the port you want the application to run on in
Container Port.
- Fill your
- Ensure that
Resource Requests & Limitshave values set by default. - Click
Commit to Repo.
- Set
- Once this is done, your app builds and deploy configurations are saved and ready to be deployed.
- Go to the
Applicationsfrom the sidebar and select your app. Now click onTrigger Pipeline. - You will see the status of deployment under Run History. You can also view the history of the Build and the Run stages independently below.
- Now, go to the Applications page and look for your application
Battleship. - Scroll right, and click the PREVIEW URL against
Battleship. This is the URL where yourBattleshipapplication is being hosted. - Mavigate to the URL you provided as
Hostname. You should see the following screen:
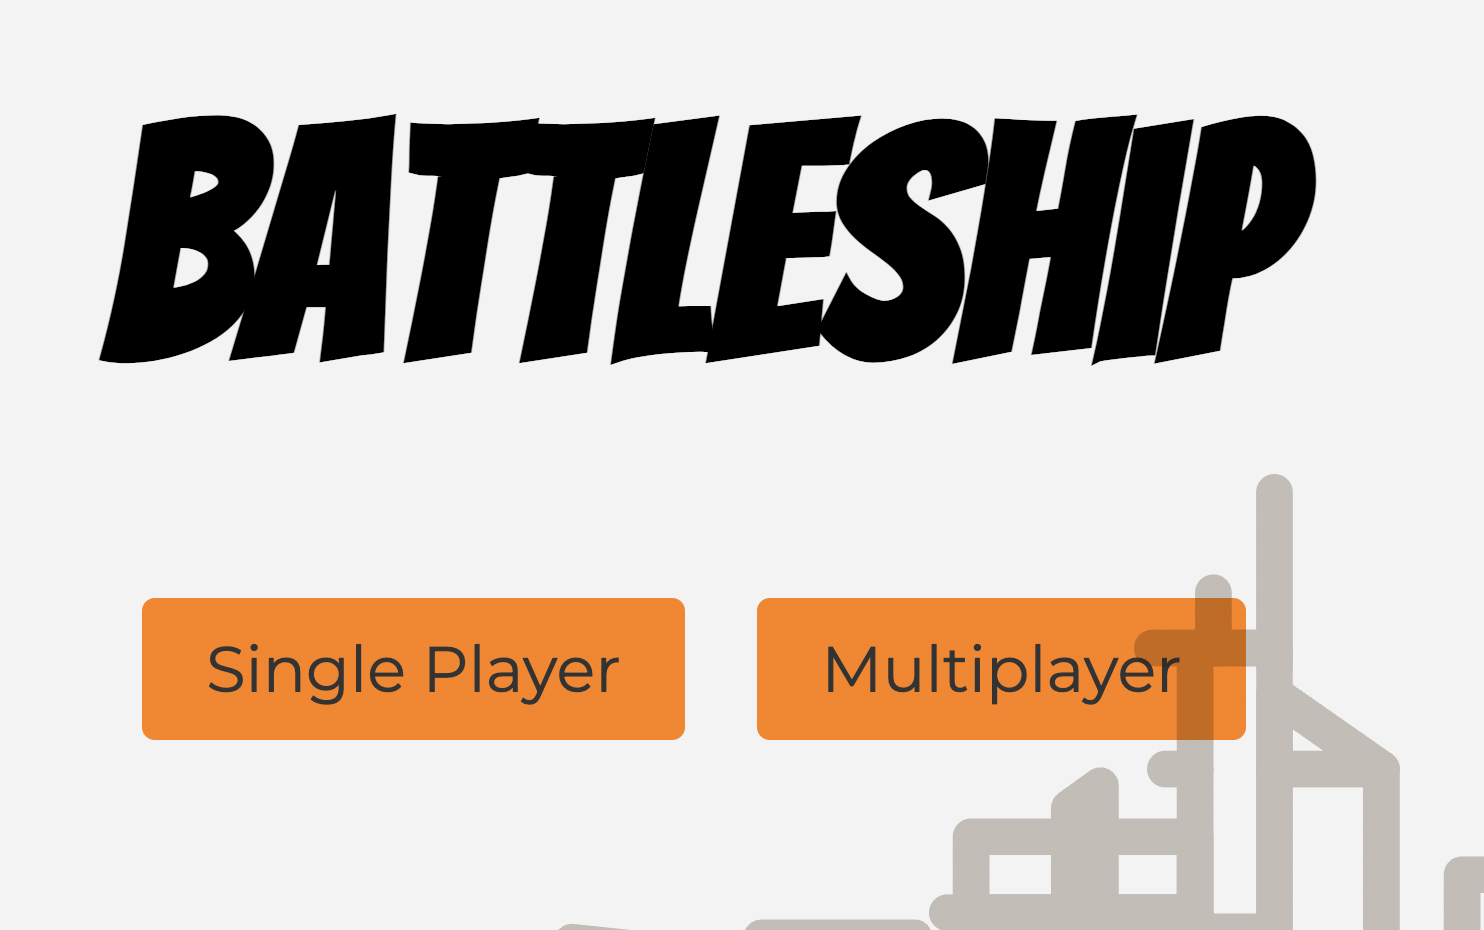
You’ve successfully deployed your example application using Argonaut! Let’s test whether your application is automatically deployed when you push a code change.
8. Test automatic deployment
You’re now ready to test if your app gets deployed automatically whenever any code change is pushed to it. Let’s make a code change, and view the app again.
- Git clone your forked
battleshipsrepository on your local machine. - Make a code change, and push to remote.
- Check your application’s deployments on Argonaut dashboard:
Applications→Battleship→Run Historyfrom the top bar. - You’ll see an ongoing deployment against your commit ID.
- Once the deployment is complete, navigate to your service URL to test that your code change is live.
That’s it!
You just used Argonaut to successfully set up the automatic deployment of an example application on every code push. You can now connect your own app with Argonaut to automate its deployment.