GCP
In this walk-through, you’re going to automate the deployment of an example application to Kubernetes (GKE) runtime on GCP using Argonaut. It's aimed at first-time users of Argonaut.
The pre-requisites for this deployment are:
1. Create an account
If it’s your first time using Argonaut, you must sign up for an account. You will then receive an email with an account activation link. Alternatively, if you already have one, log into your account.
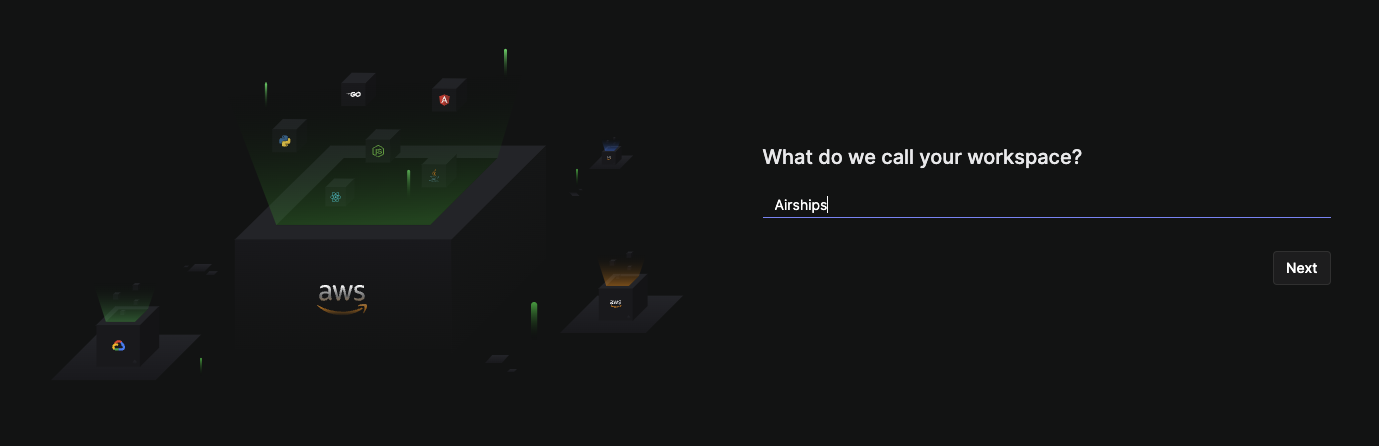
2. Create your workspace
Each Argonaut account needs to be associated with one Argonaut workspace.
- Type in a name for your
Workspace. This CAN be changed later. - Click
Next
3. Connect your GCP account
To connect your GCP account with Argonaut:
- Log into your GCP account, if not already logged in.
- Go to Google Cloud Console.
- Create an Organization resource.
- Create a project within your organization resource.
- Attach your project to a billing account.
- Get and copy your organization resource ID.
- Navigate to Argonaut dashboard.
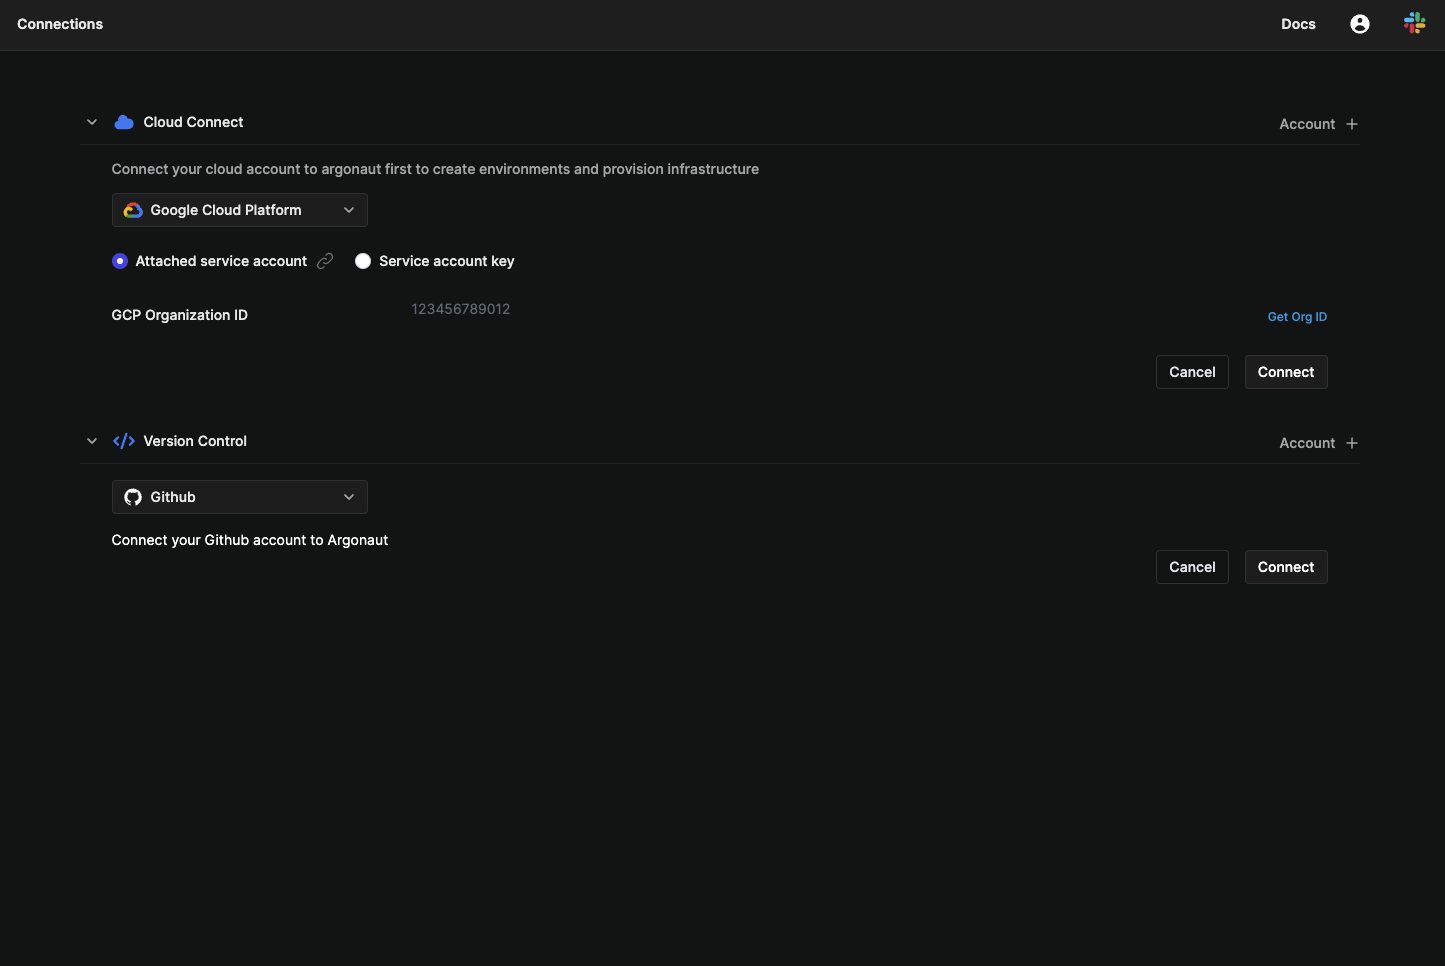
- Click on the Settings icon on the sidebar and click Connections.
- Under
Cloud Connect, click onAccount +. - Select
Google Cloud Platformfrom the dropdown. - Paste your GCP organization resource ID, and click
Connect. - Copy the shown code snippet.
- Run that code snippet on the provided Cloud Console URL.
- Go back to your Argonaut
Cloud Connectpage and refresh the status of your organization resource. - Verify that the status of the organization now shows
Connected.
4. Connect your GitHub account
On the same screen, you will see a Version control option. Here, you can connect Argonaut to your GitHub or GitLab repository. For this demo, we use GitHub.
- In the Version Control section, click on
Account + - Choose
GitHub, and click on theConnectbutton. - Click on the GitHub account you’d like to connect with Argonaut. You’ll host your sample application on this account.
- Click on
Installto installArgonautBoton your chosen GitHub account. - Enter your password, and click on
Confirm Password. - On successfully connecting your GitHub account, you’ll be redirected to the
Version Controlpage that shows your GitHub account.
5. Create a GCP environment
- Click on
Environmentsin the sidebar. - Click on
Environments +. - Choose
Google Cloud Platform. - Choose your GCP Org from the dropdown.
- Choose your GCP Project from the dropdown.
- Name your GCP environment and select the region. The region CAN'T be changed later.
- Click on
Create Environment.

The chosen GCP project must be attached to a GCP billing account and be a part of a GCP organization.
To check if the environment creation was successful, navigate to the Environments page from the sidebar, and look for your environment's name in the list.
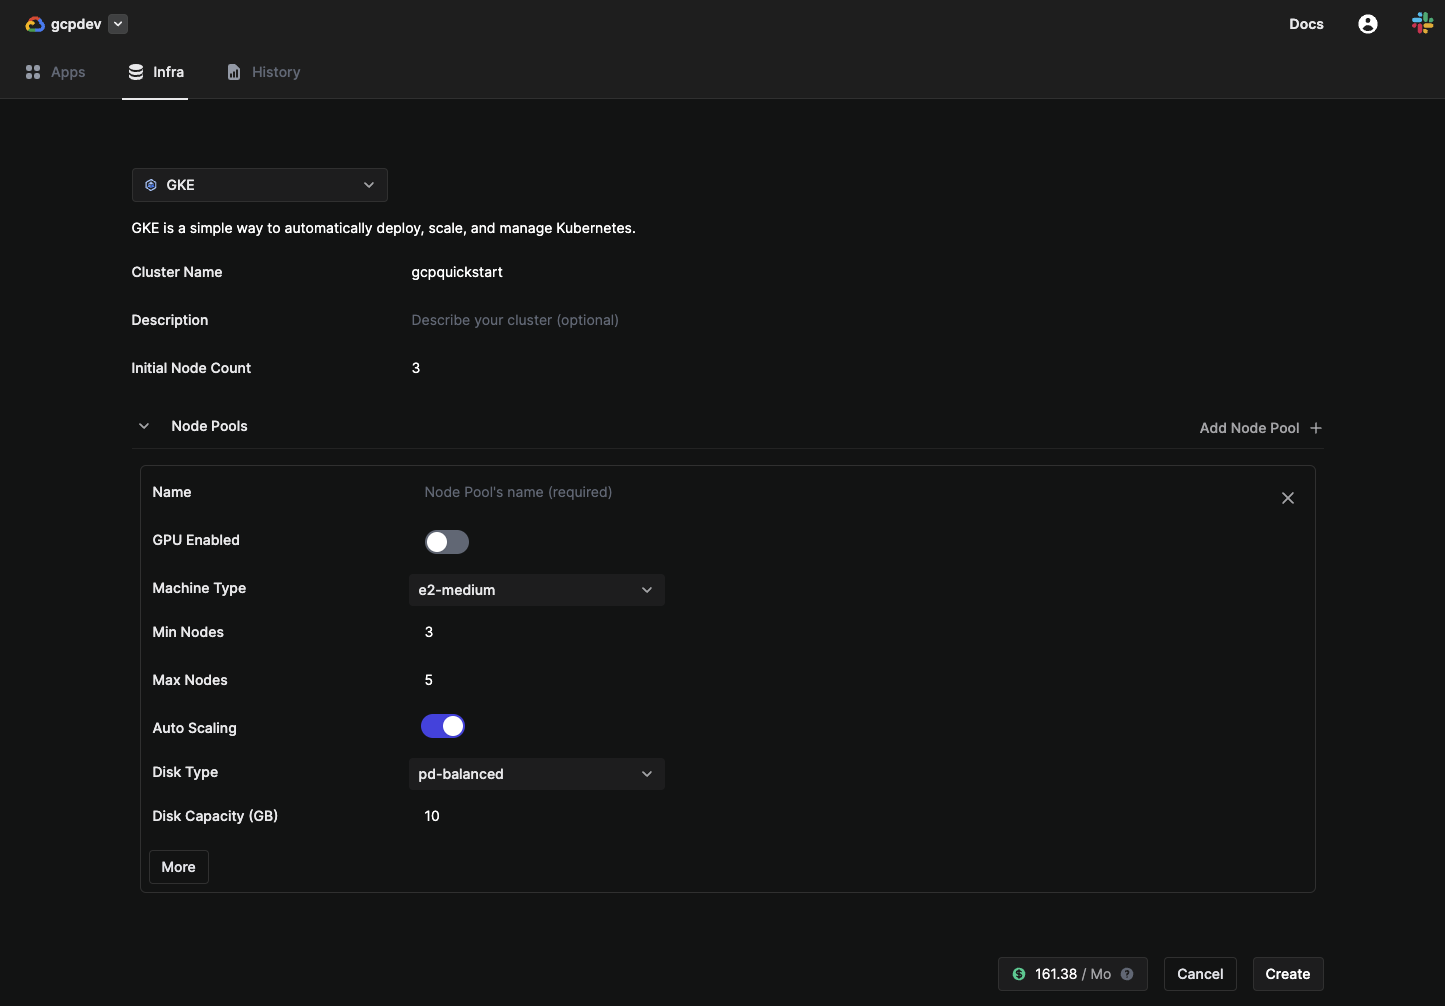
6. Create a GKE cluster
To deploy your application on K8s, you need to first create a K8s cluster:
- Navigate to
Environments, select your new GCP environment. - Click on the
Infratab. - Click on
Resource +. - Input the following values:
- Cluster Name as
gcpquickstart. - Initial Node Count as
3.
- Cluster Name as
- Click
Node Pool +.- Set Nodes:
Minas3andMaxas5. - Machine Type:
e2.medium. - Autoscaling toggled on.
- Disk Type:
pd-balanced. - Set
Disk Capacityas10.
- Set Nodes:
- Click on
Create.
Your cluster is now created.
7. Set up automatic deployment
- Fork the battleships repository into your GitHub account - the same account that you’ve connected to in Argonaut. The rest of the steps assume that the name of the forked repository is also
battleships. - On your Argonaut dashboard, click on
Applicationsfrom the sidebar. - Click the button
Applications +on the top right. - Name the application as
Battleshipand click onCreate. - Click on the
Pipeline +button next to the Battleship application. - This opens the pipeline builder view with Build and Deploy stages.
- Enter a pipeline name as
Test Pipeline. - Select your
Git account,battleshipsrepository, andmainbranch.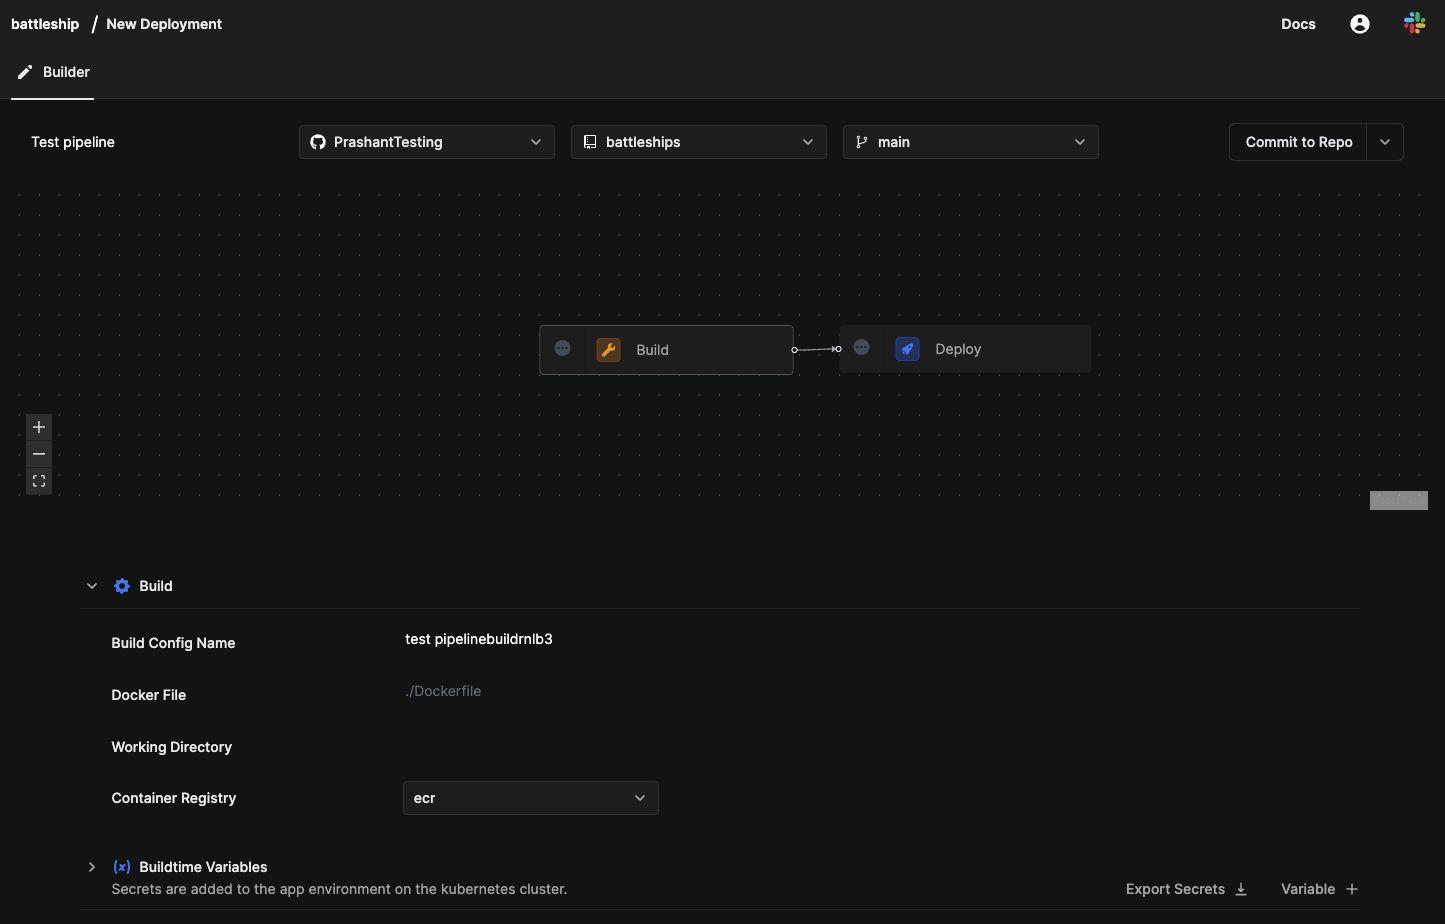
- Select the
Buildstage. Enter build details.- Set Build Config name as
firstbuild - In Path, fill ./Dockerfile.
- Set Build Config name as
- Select the
Deploystage. Enter deployment details.- Set
Service TypeasStateless. - Ensure the correct environment and kubernetes cluster is chosen.
- Under
Network Services, clickAdd Service.- Fill your
Hostname. - Fill the port you want the application to run on in
Container Port.
- Fill your
- Ensure that
Resource Requests & Limitshave values set by default. - Click
Commit to Repo.
- Set
- Once this is done, your app builds and deploy configurations are saved and ready to be deployed.
- Go to the
Applicationsfrom the sidebar and select your app. Now click onTrigger Pipeline. - You will see the status of deployment under Run History. You can also view the history of the Build and the Run stages independently below.
- Now, go to the Applications page and look for your application
Battleship. - Scroll right, and click the PREVIEW URL against
Battleship. This is the URL where yourBattleshipapplication is being hosted. - Mavigate to the URL you provided as
Hostname. You should see the following screen:
You’ve successfully deployed your example application using Argonaut! Let’s test whether your application now automatically gets deployed when you push a code change.
8. Test automatic deployment
You’re now ready to test if your app gets deployed automatically whenever any code change is pushed to it. Let’s make a code change, and view the app again.
- Git clone your forked
battleshipsrepository on your local machine. - Make a code change, and push to remote.
- Check your application’s deployments on Argonaut dashboard:
Applications→Battleship→Run Historyfrom the top bar. - You’ll see an ongoing deployment against your commit ID.
- Once the deployment is complete, navigate to your service URL to test that your code change is live.
That’s it!
You just used Argonaut to successfully set up automatic deployment of an example application on every code push. You can now connect your own app with Argonaut to automate its deployment.