Choosing Kubernetes Instances
This guide goes over some key considerations for choosing the pods and instance types.
Kubernetes Instance Calculator is a great free and open-source tool to help you visually understand the various instance types, costs, utilization, and more.
If you have tried creating a Kubernetes cluster, you would have noticed that there are several hundreds of instance types and configurations for both AWS EKS and GCP GKE. And every other month, there are new resource types added by the cloud providers.
As a Kubernetes user, understanding all these and choosing the right instances can be a daunting task. However, understanding a few basic concepts and planning your cloud utilization can help you use the best-suited resource for your workload and help it run more efficiently.
Using the Kubernetes Instance Calculator
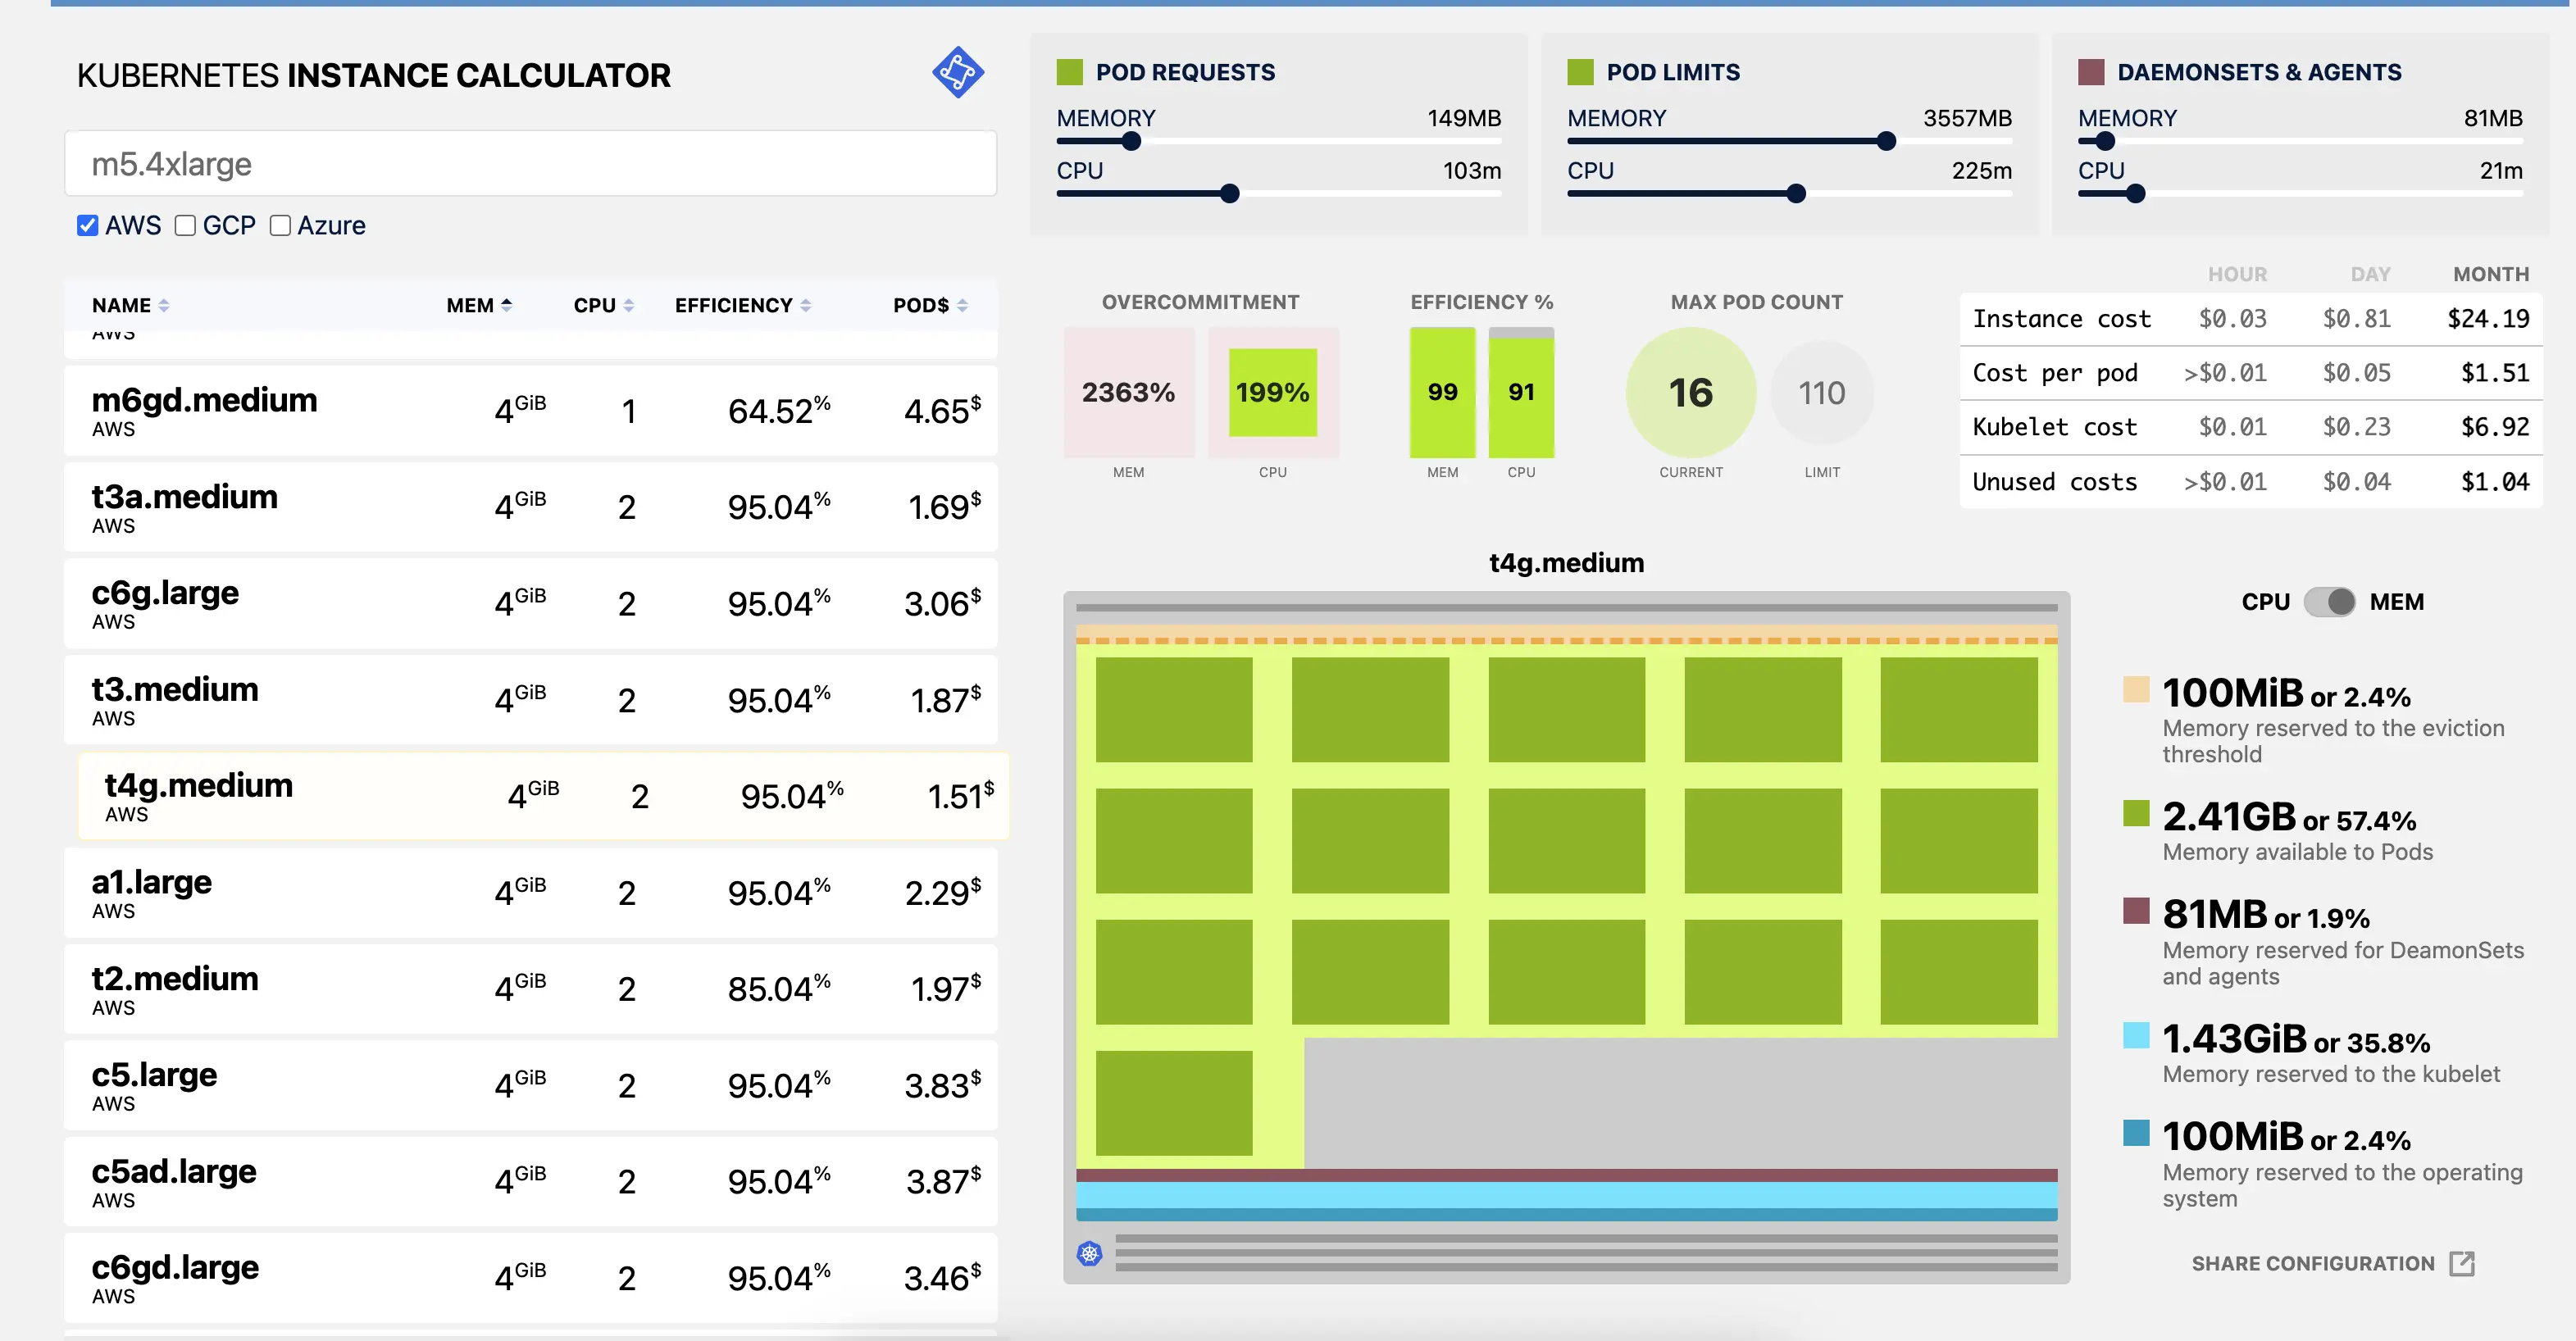
The tool provides an intuitive and visual representation of all Kubernetes instances on AWS, GCP, and Azure.
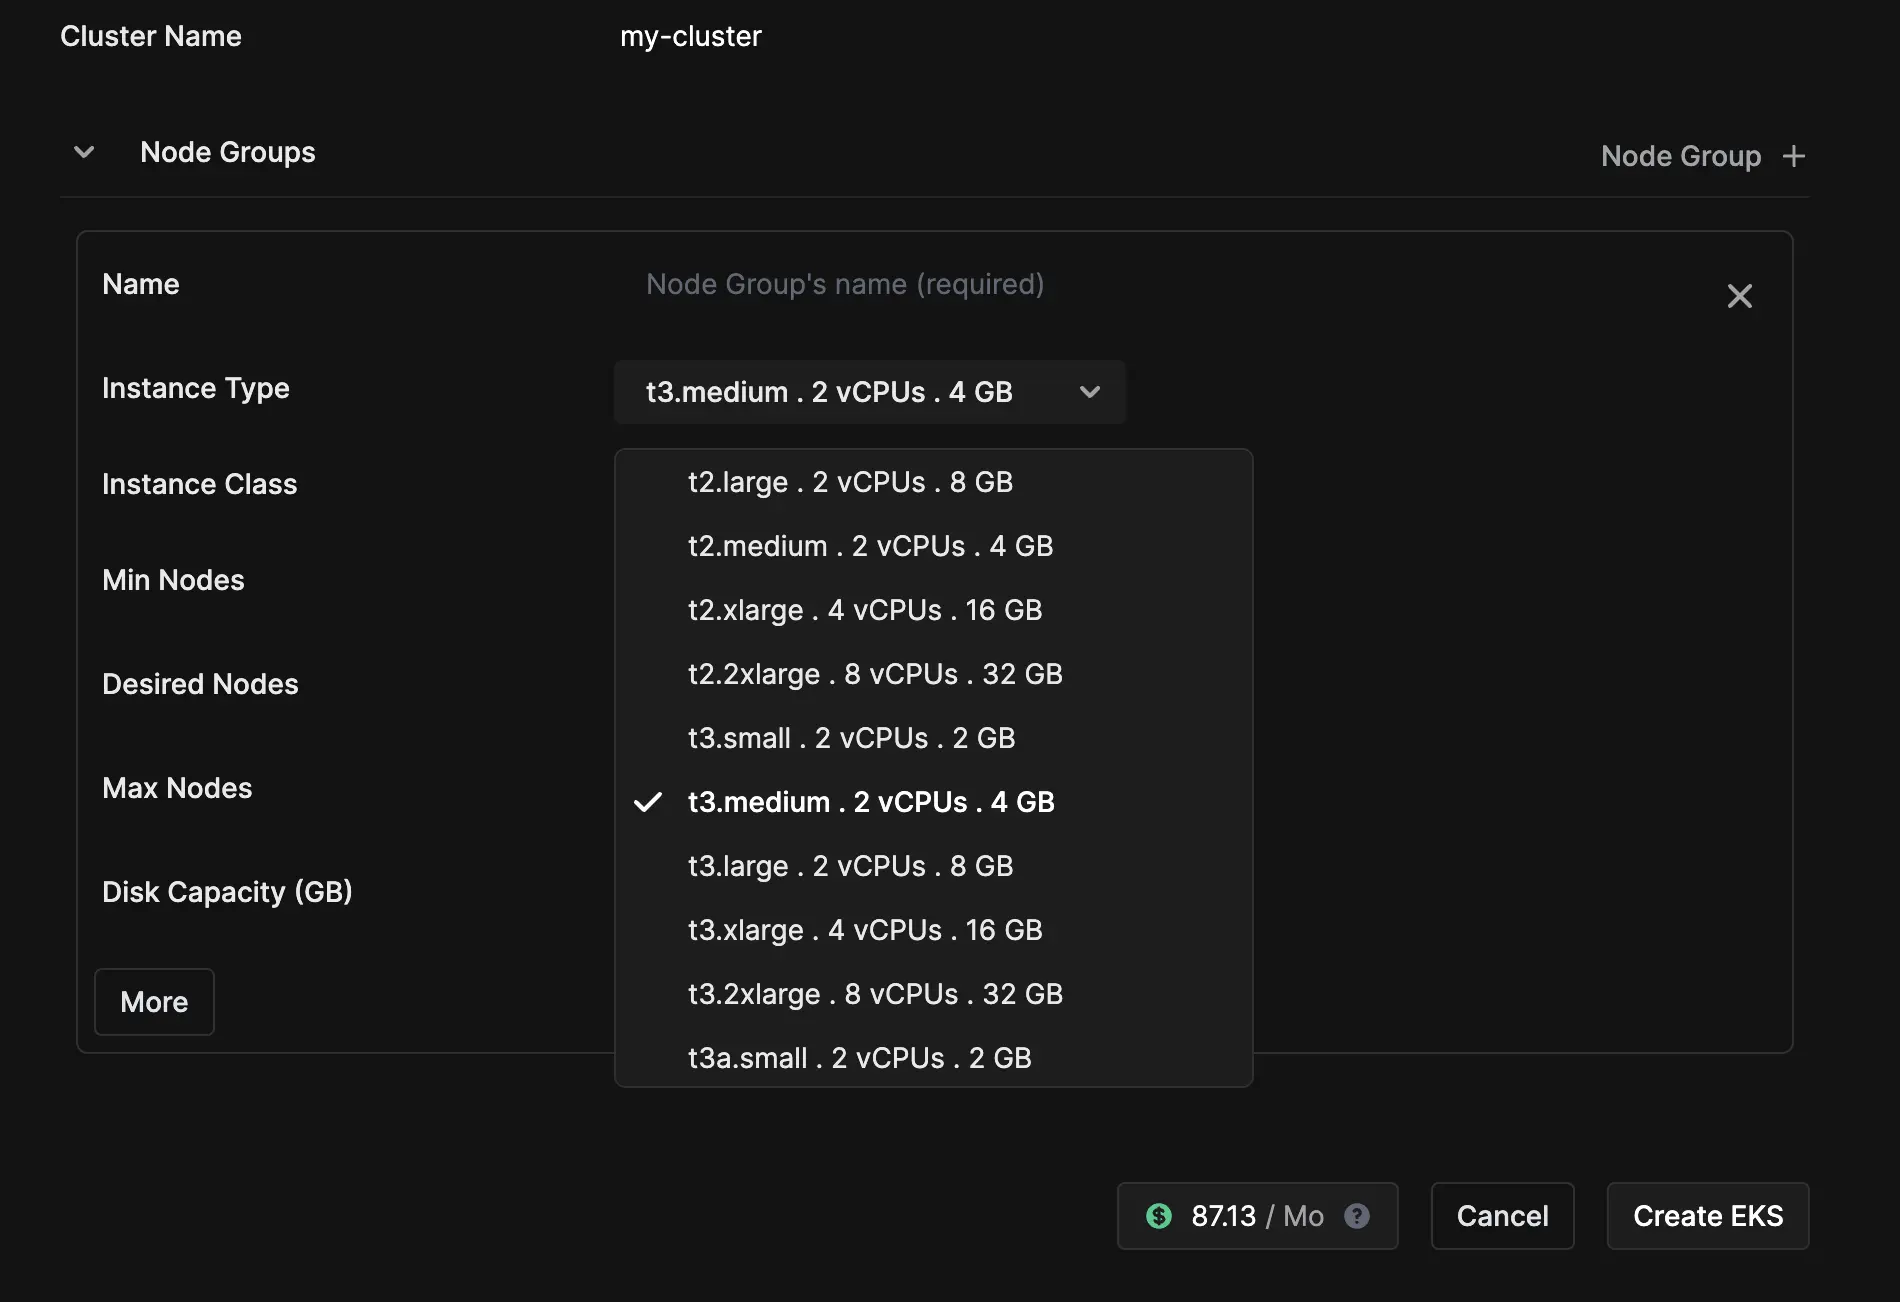
Start by setting the instance type. If you’re uncertain about the instance and want to compare a few options, sort by name/memory/CPU to see similar instance options.
Set pod requests and limits, CPU and Memory usage of DaemonSet and agents can also be specified while writing a DaemonSet spec.
💡 Note: While you can assign the same value for requests and limits, having requests lower than the actual limits is common.
Now, with the requests and limits specified, you will see the Overcommitment, Efficiency, Max Pod Count, Estimated costs, and more. Towards the left side of the screen, you will see multiple instance options with different efficiency and pod prices mentioned. This helps in comparing and picking the right option for your workload.
Good to know
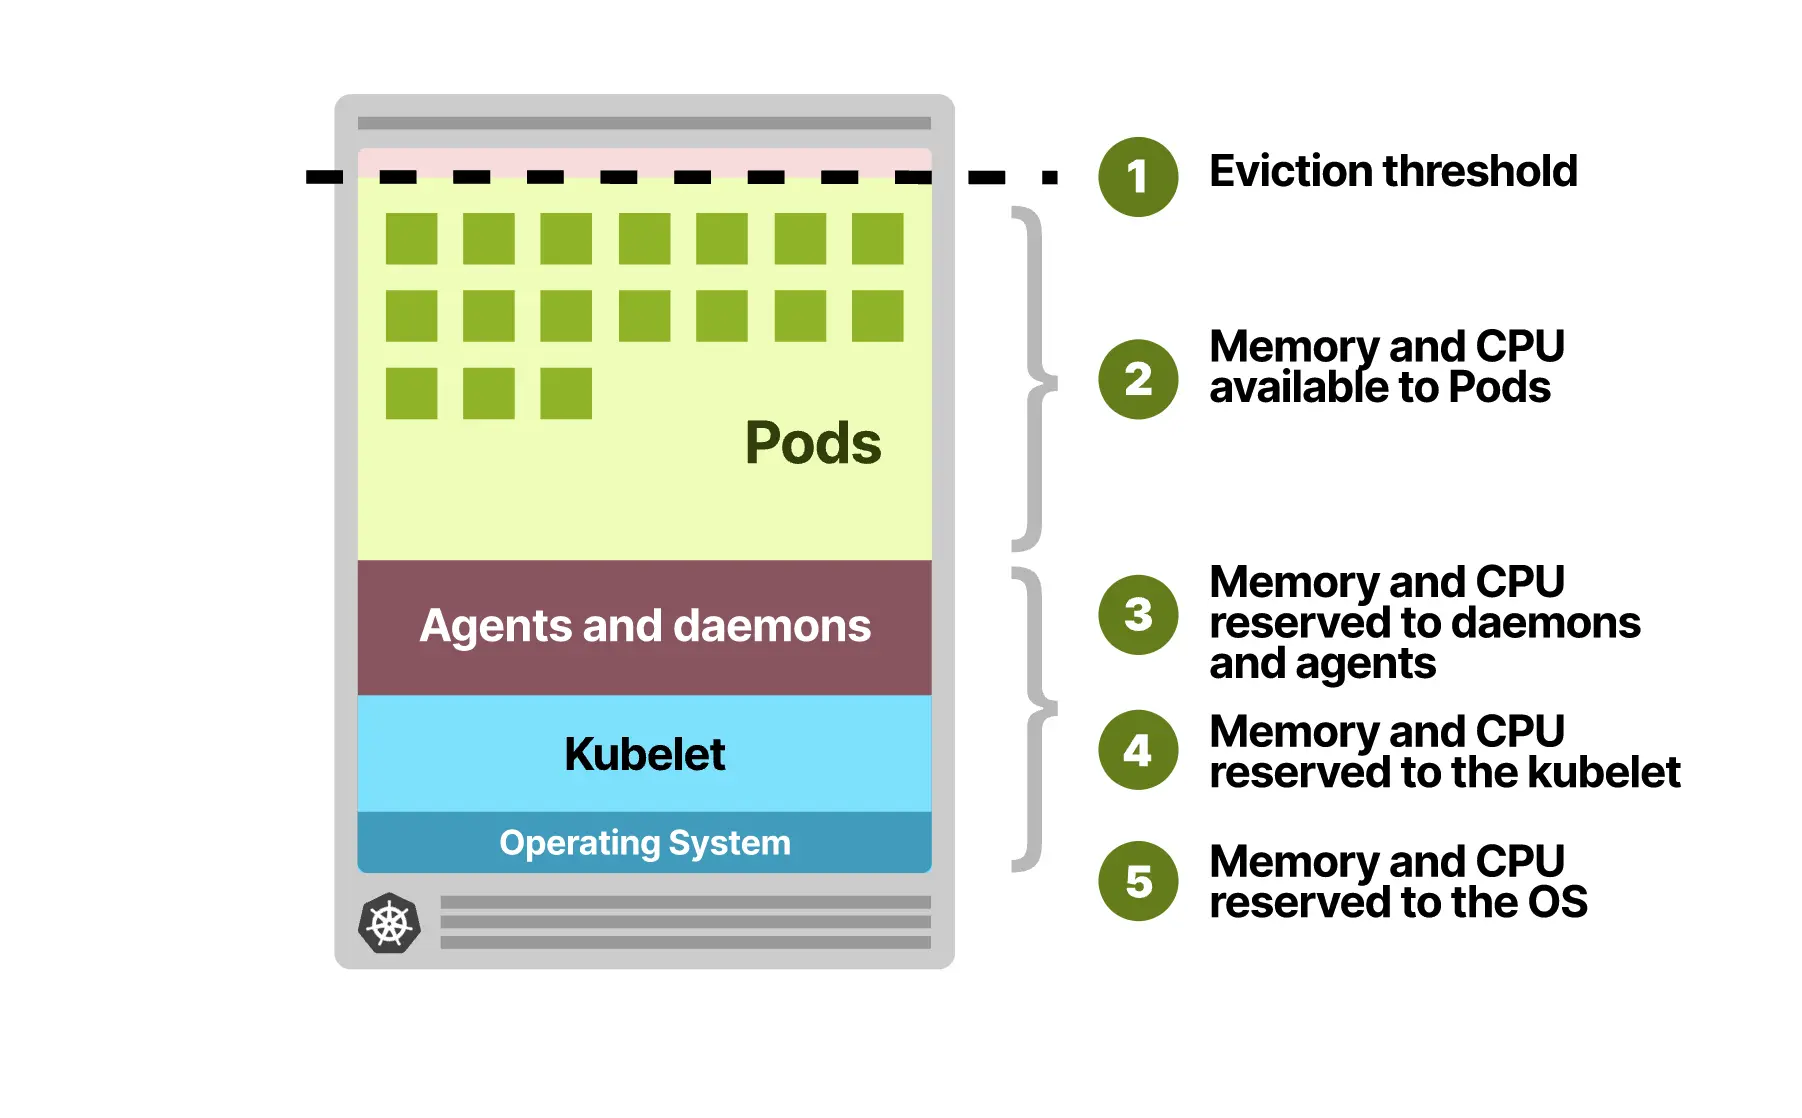
Not all CPU and memory in your Kubernetes nodes can be used to run Pods. Kubernetes also reserved memory for the eviction threshold to evict workloads when there isn't enough space left on the node. The node has to run processes such as the Kubelet, daemons such as Fluentd or kube-proxy, and the operating system.
Maximum pod limits
- GKE nodes are limited to 110 Pods each. That is also the default Pod limit in Kubernetes. Since GKE allocates a subnet with 254 hosts for each node, and the IP addresses might be recycled when a Pod is deleted, GKE can have 110 pods in Terminating and 110 in Creating simultaneously (220 IP addresses).
- In EKS, if you’re not using AWS-CNI or a version older than 1.9.0, the max number of pods per node is 110. For AWS-CNI 1.9.0 or greater, the number of Pods depends on the number of ENIs assigned to the instance. ex. m5.large can have up to 58 pods, and an m5.16xlarge can have up to 737 pods. This list has the ENIs for each EC2 instance.
Resource requests and limits
Resource requests specify the minimum amount of CPU and memory that a Pod needs to run.
Resource limits specify the maximum amount of resources that a Pod can consume.
If a Pod exceeds its memory or CPU limits, it will be terminated and replaced by Kubernetes. It's important to set requests and limits appropriately to ensure that your workloads have the resources they need to run effectively without wasting resources.
Node groups - You can have nodes of multiple types in a single cluster, and these can be part of different node groups.
Autoscaling - Triggering the autoscaler too often is usually an issue, so you want to:
- Provision nodes that are large enough for your workloads.
- Assign the correct requests to your workloads. Assigning less or more will eventually lead to scaling too soon or too late.
- Our blog article walks through node sizing strategy with recommendations for startups.