Docusaurus
Follow these steps to deploy Docusaurus using Argonaut to your Kubernetes or AWS Lambda environments.
Account Setup
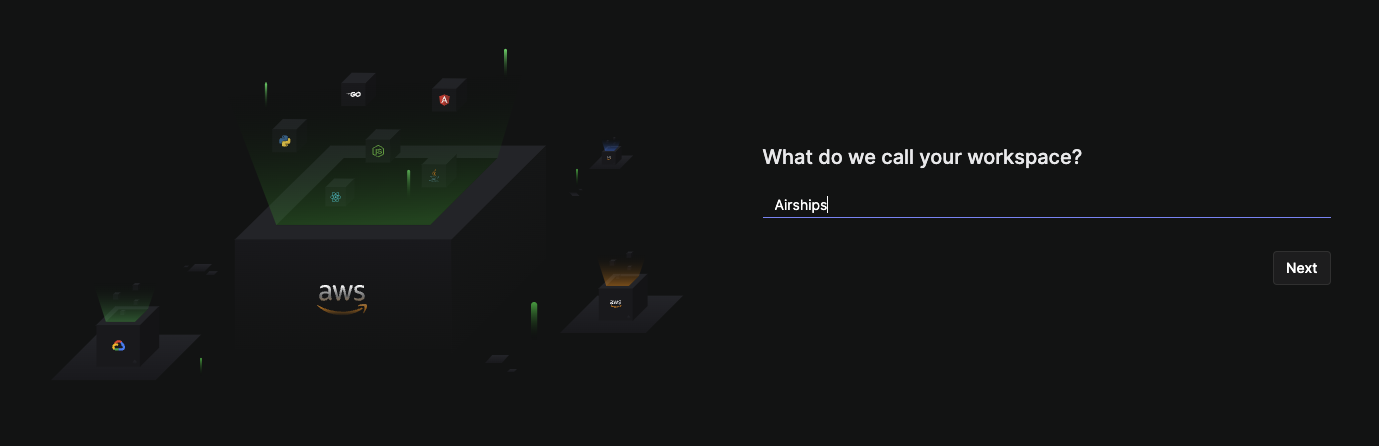
- Create an Argonaut account by visiting https://ship.argonaut.dev.
- Type in a name for your Workspace. This CAN be changed later. Click Next.
- You will be taken to the Connections page under Settings. Argonaut connects to AWS as an IAM user.
- Connect your Git from the same Connections page, GitHub and GitLab are supported.
- Select the
EnvironmentsTab from the sidebar.- Click on
Environment + - Choose Amazon Web Services. Give your environment a name,
Env.
- Click on
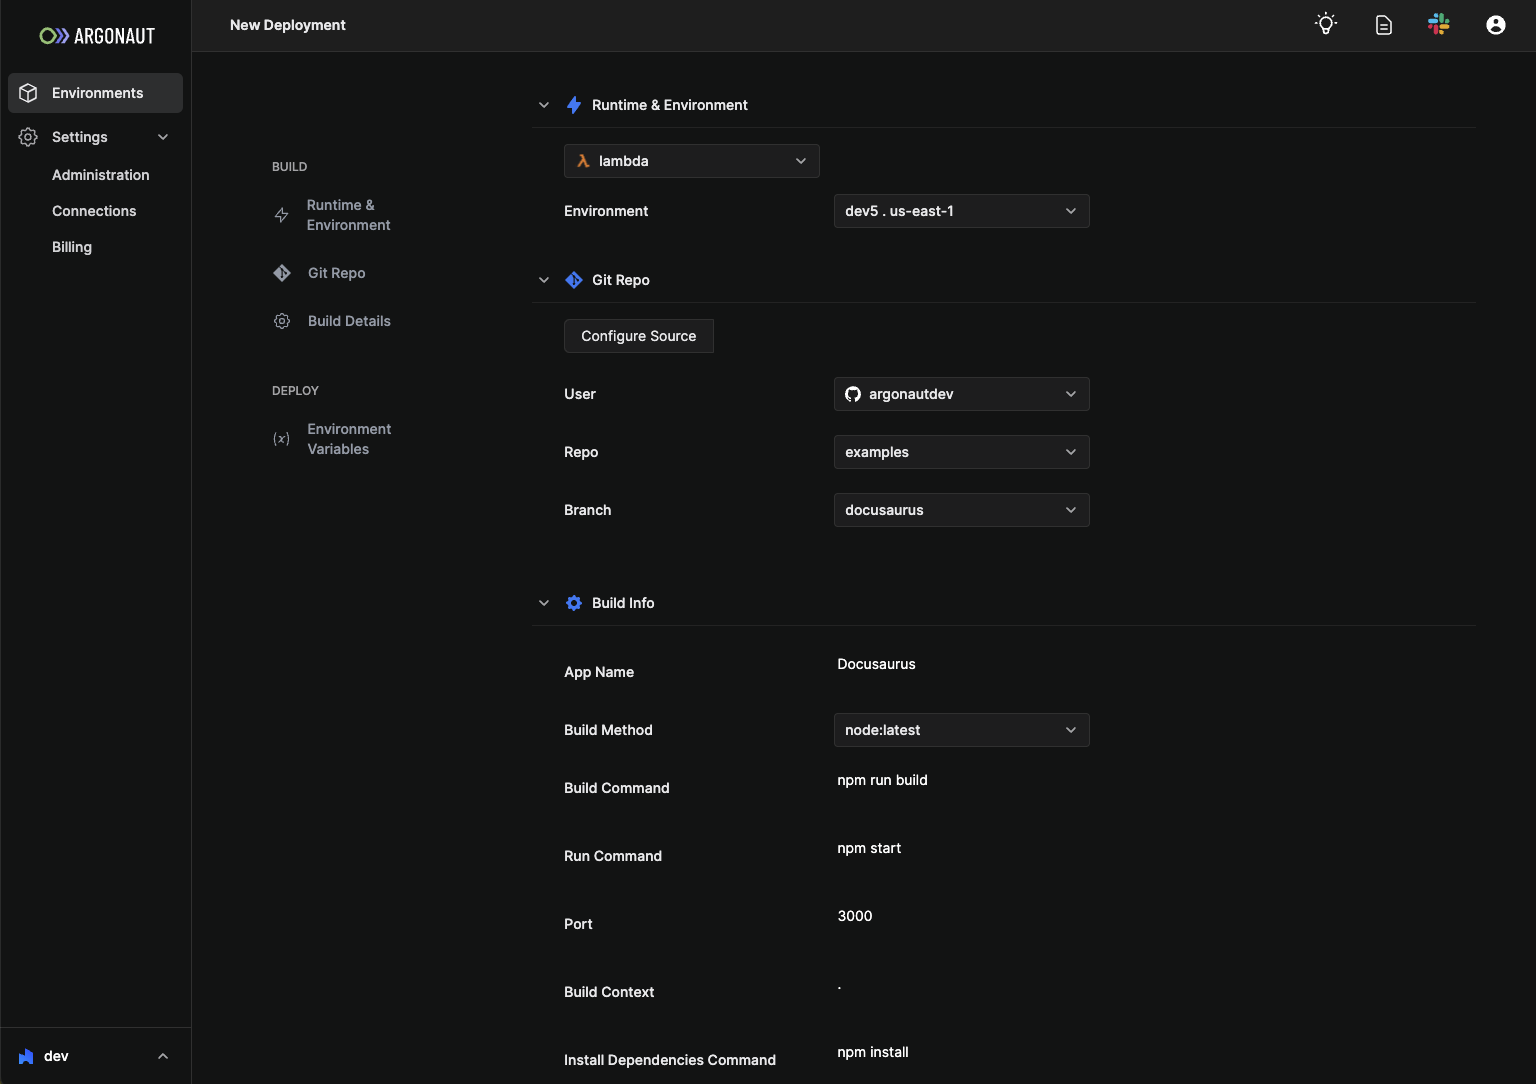
Deploying to AWS Lambda
- Choose your environment and the application name.
- Select runtime as
Lambda. - Specify build details
- Build context would be something other than
.if it is a monorepo. - Install Dependencies:
npm install - Build Command:
npm run build - Run Command:
npm start - Port number is
3000
- Build context would be something other than
- Choose memory size, timeout, and custom domain hosted on AWS Route53.
- Upload your secrets via a
.envfile. - Click on Deploy.
Deploying to Kubernetes (EKS)
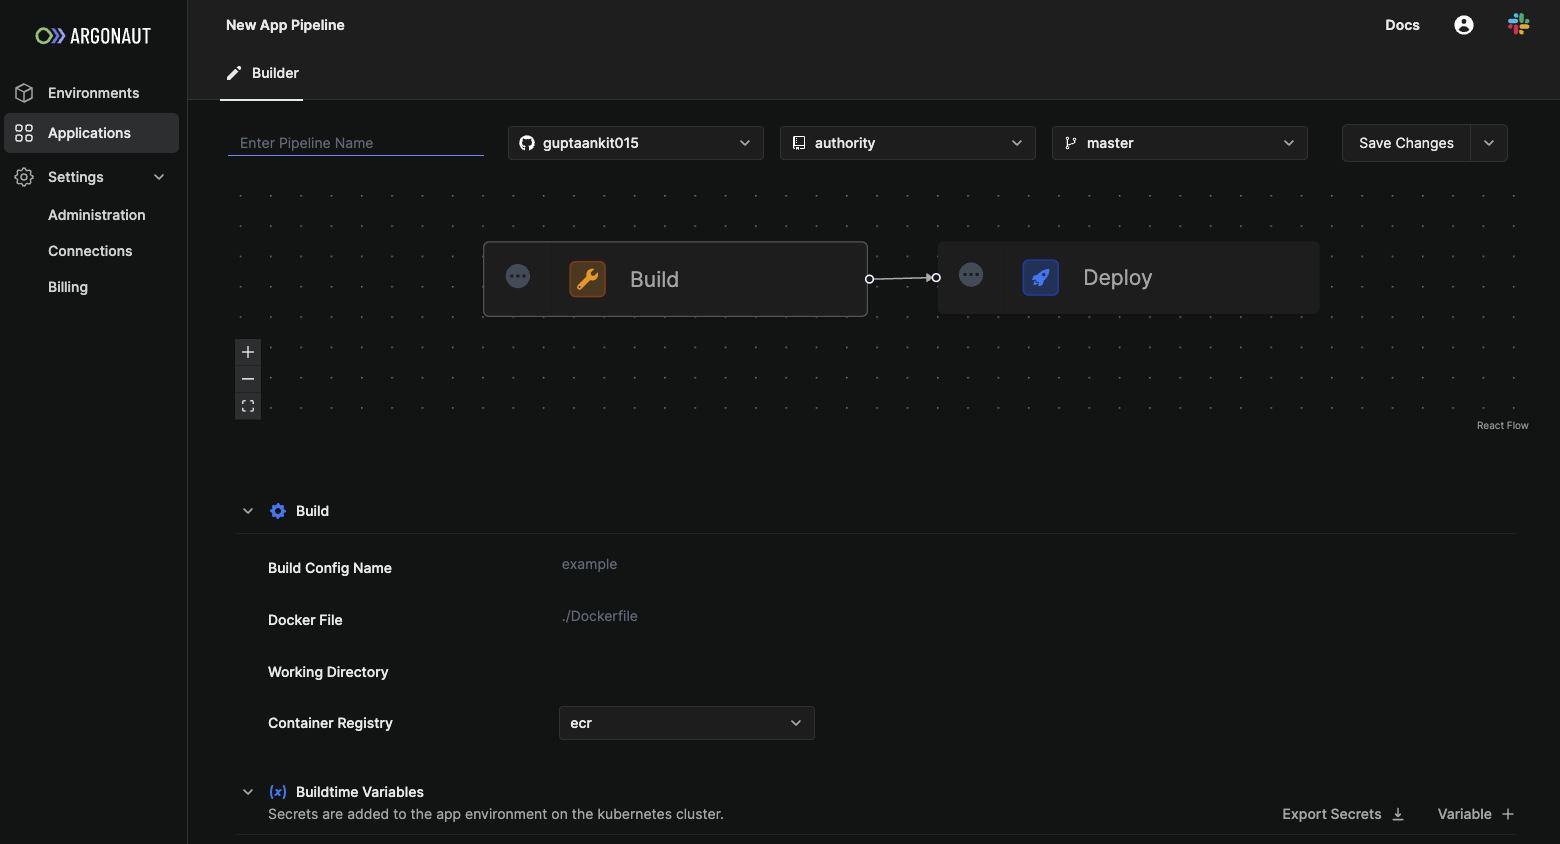
Click on the Applications tab from the sidebar.
Click
Application +on the top right.Give it an application name,
Docusaurusand click onPipeline +.Choose the Git repository where your Docusaurus app is located.
Click on the Build stage and set Build Configs.
- Build config nameL:
Docusaurus - Docker File:
./docusaurus/Dockerfile. Alternately, buildpacks can be used for automatic detection and deployment. - Working Directory:
. - Container Registry:
ecr
- Build config nameL:
Click on the Deploy stage and set Deploy Configs
- Choose your environment.
- Select your target clusters or create new.
- Service Name: Name your Docusaurus app
my-docs - Service Type:
Stateless
Network settings and scaling
- Click
Service +. - Container port number: Docusaurus by default runs on
3000. Expose your port in the Dockerfile if you're changing this port number. - Type of Network:
HTTPSis used for Docusaurus - Host Name: The URL to access your Docusaurus application
docusaurus.mywebsite.com - Resource Requests & Limits: Set CPU and Memory values.
0.5CPU and500Mmemory is a good start. - Enable horizontal autoscaling
- Health Check: Can be used to report status via HTTP GET
- Click
Upload secrets for the app environment on the k8s cluster.
- Secrets are Key-Value pairs added to your k8s environment.
- They can be used during runtime or buildtime.
- Easily drop your
.envfile or add secrets manually. - Mount files such as certificates as secrets to your kubernetes pods.
Click on Commit to Repo
Add a CNAME for the hostname to the loadbalancer to access the app.
Testing your deployment
- After clicking Commit to repo, you’ll be taken to the deployment Logs. Your application is now being deployed. Check the output section of the logs.
- Now, go to the Applications page and look for your Docusaurus application.
- You can get the deployed URL from the applications page, and you have now successfully deployed your Docusaurus application.