SigNoz
This guide covers the steps to install SigNoz OpenTelemetry (Otel) collector on your Kubernetes cluster using Argonaut.
SigNoz is an open-source application performance monitoring tool that helps you monitor your applications and troubleshoot problems. SigNoz uses distributed tracing to gain visibility into your software stack. It helps teams with things like monitoring application metrics, monitoring infrastructure metrics, tracking user requests across services, and more. To know more about the architecture of SigNoz and its components in detail, go over the following documentation.
SigNoz collects data using OpenTelemetry, an open-source observability solution. Therefore, SigNoz supports all the frameworks and languages supported by OpenTelemetry.
Prerequisites for installation
- Managed Nodes running Linux. Windows is not supported Yet
- Kubectl access to Cluster
- x86-64/amd64 architecture resource(s) supported. Arm64 is not in support
- CertManager
- Argonaut account with an active environment
- Kubernetes cluster v1.21 and above & Helm 3.8+ and above (Argonaut maintains the latest stable versions)
- SigNoz account that is setup
Components installed
The SigNoz Helm chart will install the following components into your Kubernetes cluster:
- Query Service (backend service)
- Web UI (frontend)
- ClickHouse (datastore)
- OpenTelemetry collector
- Alertmanager
Setup Library App in Argonaut
You can add SigNoz to Argonaut as a custom third-party Library app. This will then be available in your cluster under Add-Ons.
Add the OTEL collector
Click on the
Application +and theFrom Librarybutton.
Choose
Custom-Appsunder configuration.Ensure the selected environment is correct, then select the cluster you want to deploy the agent to.
Set the namespace you want to deploy the ingestion agent to be
tools.Set the release name of the application as
signozagent.Set the chart name as
signoz.Set the chart repository as
https://charts.signoz.io.Set the chart version to
0.7.0.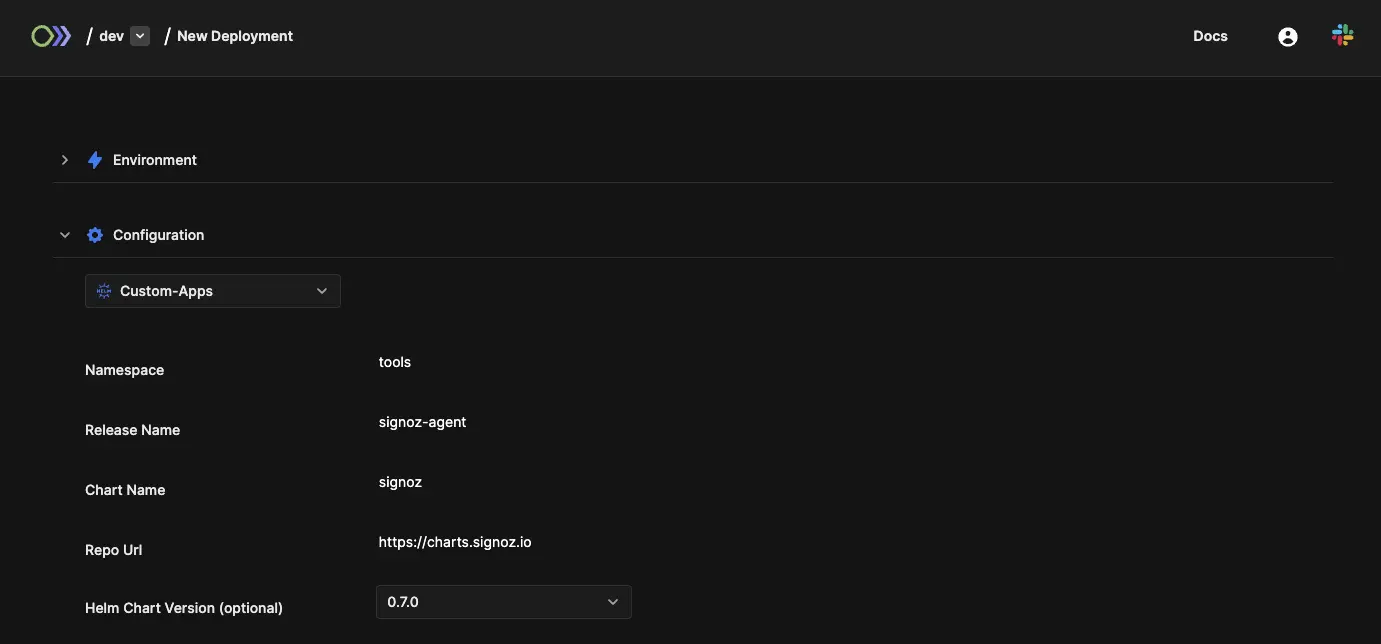
Click on load
values.yaml.You will now see all the relevant values for the deployment. The code below shows the contents of
values.yaml. Here are the other chart override options available.global:
storageClass: gp3
alertmanager:
replicaCount: 2
clickhouse:
cloud: aws
allowedNetworkIps:
- "::/0"
persistence:
enabled: true
frontend:
ingress:
enabled: true
className: nginx
annotations:
kubernetes.io/tls-acme: "true"
cert-manager.io/cluster-issuer: letsencrypt-prod
hosts:
- host: <SIGNOZ_UI_DNS_NAME> #Should be a valid DNS name
paths:
- path: /
pathType: ImplementationSpecific
port: 3301
tls:
- secretName: signoz-tls
hosts:
- <SIGNOZ_UI_DNS_NAME>
otelCollector:
ingress:
enabled: true
className: nginx
annotations:
cert-manager.io/cluster-issuer: letsencrypt-prod
nginx.ingress.kubernetes.io/ssl-redirect: "true"
nginx.ingress.kubernetes.io/backend-protocol: "GRPC"
kubernetes.io/tls-acme: "true"
hosts:
- host: <SIGNOZ_OTEL_DNS_NAME>
paths:
- path: /
pathType: ImplementationSpecific
port: 4317
tls:
- secretName: signoz-otel-tls
hosts:
- <SIGNOZ_OTEL_DNS_NAME>Click on the
Deploybutton to deploy the application. This could take up to 2 minutes.Once installed, you should see the
signoz-agentin your environment’s Add-ons section.
Issue TLS certificates for the endpoints
The next step is to expose two endpoints,
- UI: To visualize and query the data collected by Otel collectors
- Secure Otel endpoint to connect and publish metrics in another cluster
Here’s how to set a secure endpoint.
A secure endpoint needs access to:
- Cert-manager for issuing certificates
- Nginx Controller
- Route53 for DNS
Create DNS records
Before anything, let’s create DNS records in Route53 for accessing the endpoints. I am going with the following, the value for these DNS records should be ingress-nginx controller's loadbalancer DNS.
- signoz.xyz.com ( To access SigNoz UI )
- signoz-otel.xyz.com ( To access SigNoz Otel endpoint )
Once the above steps are completed successfully, you should be able to access the app. The page looks like below.
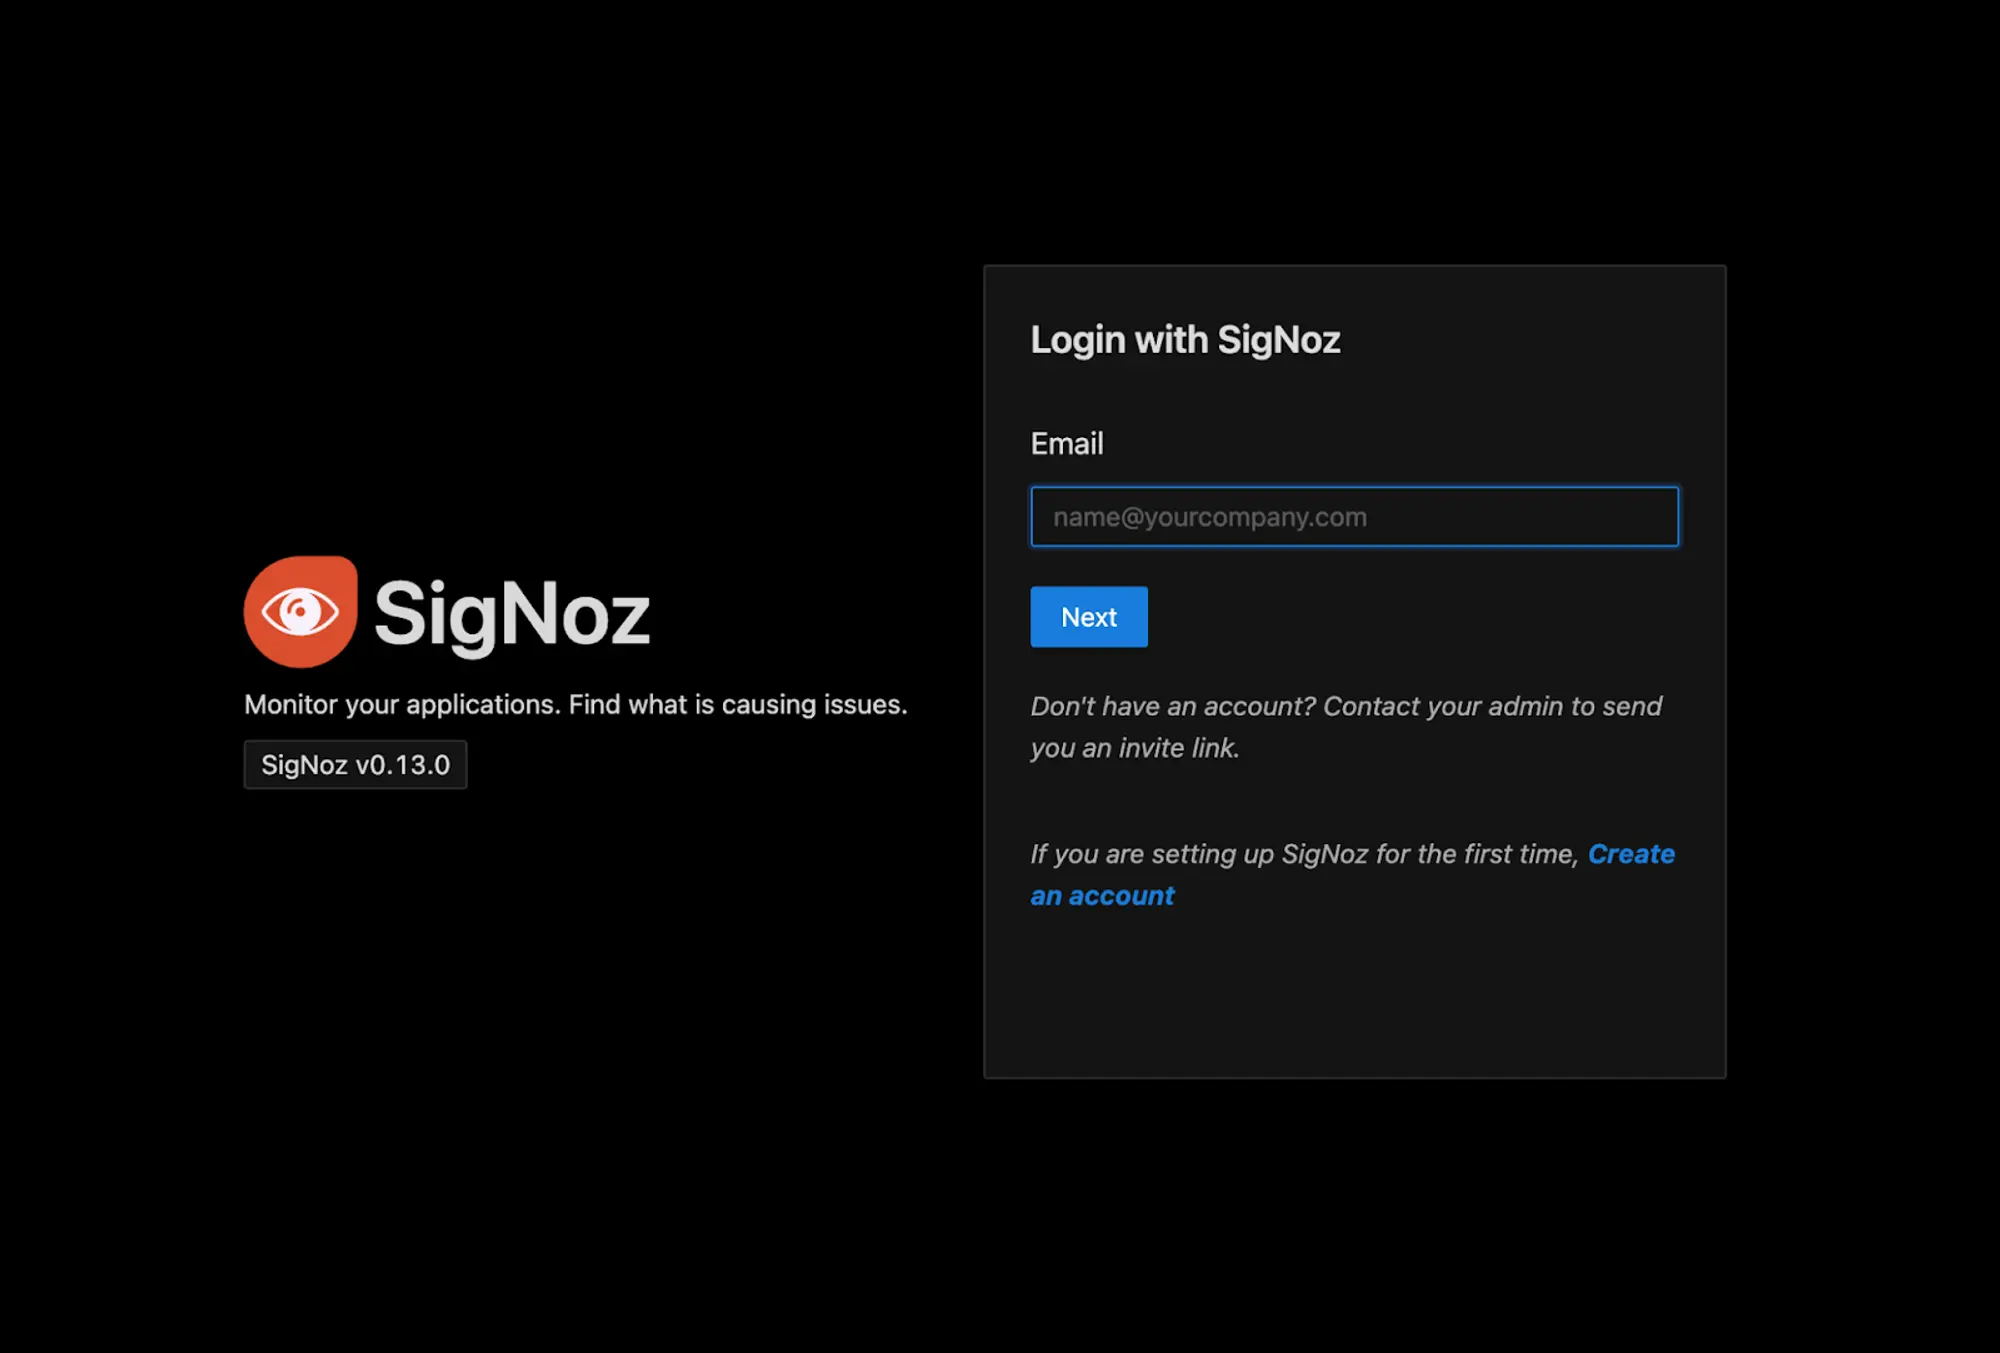
From this page, add your account credentials and Login. or Create an account.
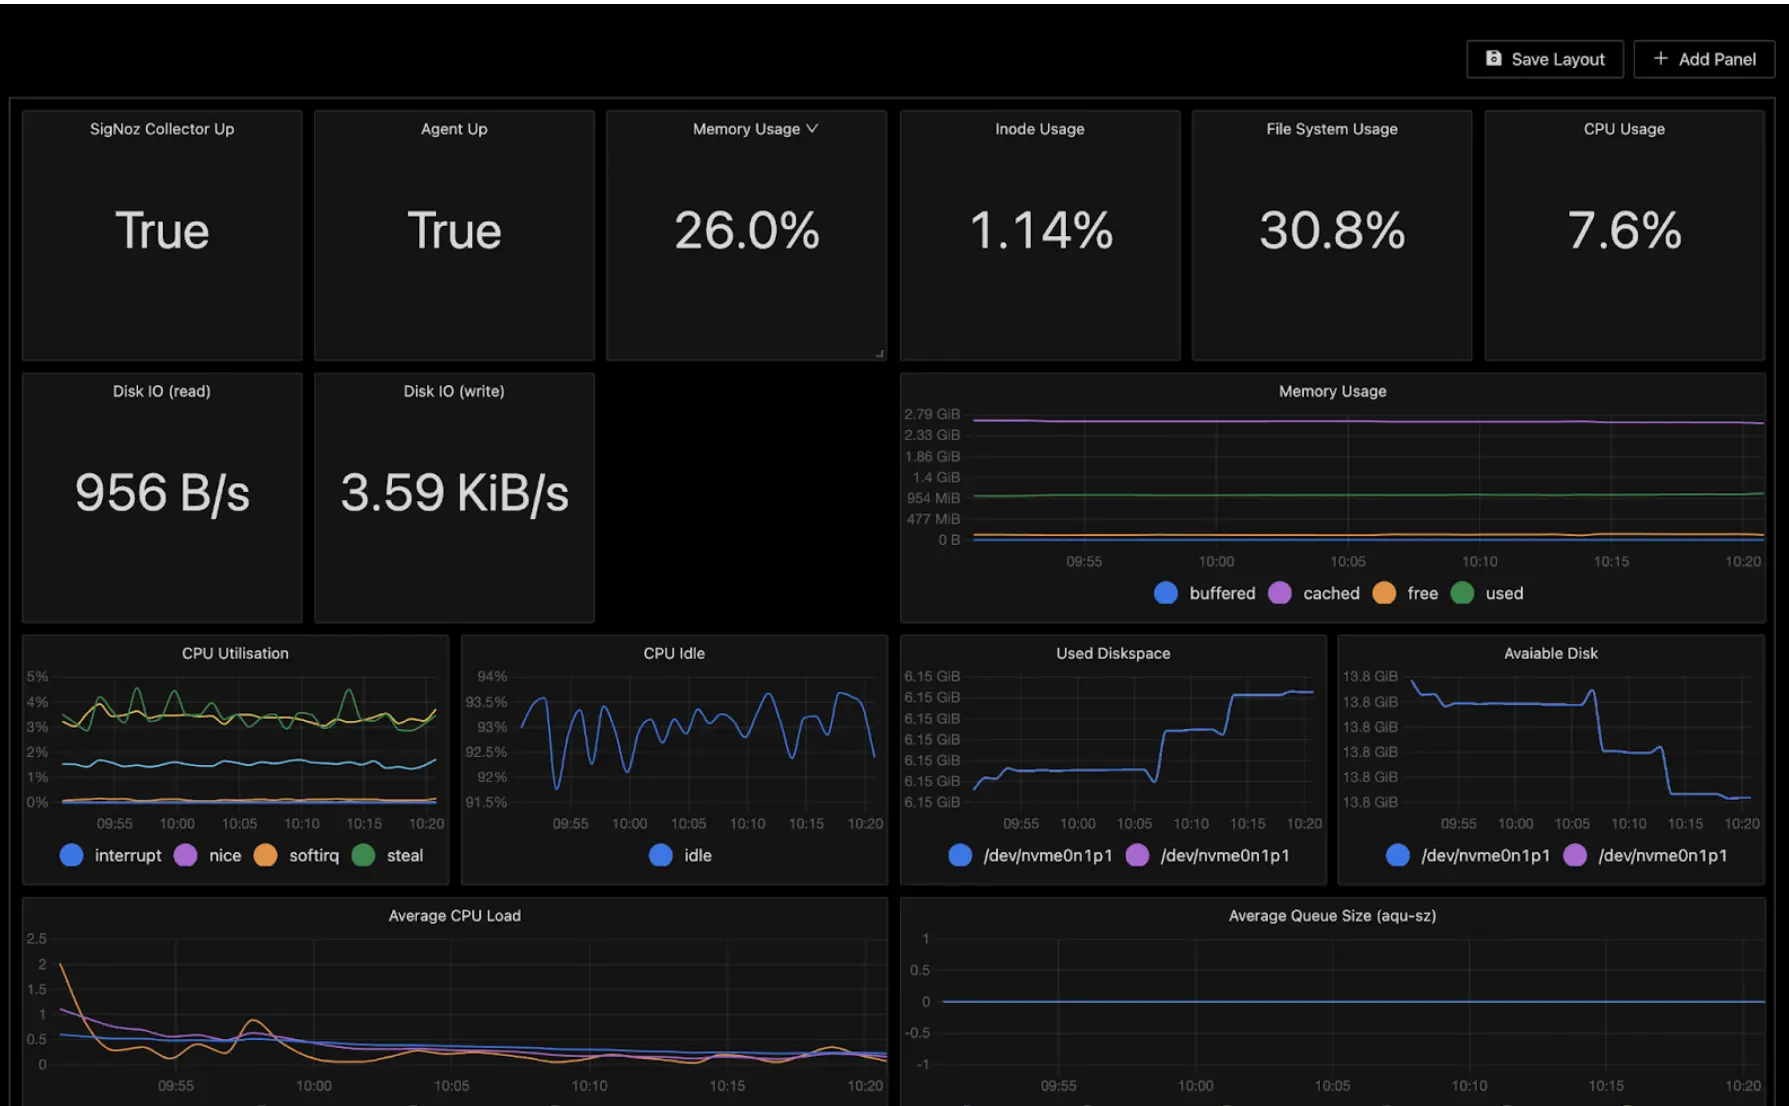
Setting up dashboards
You can create the dashboards using UI. The SigNoz team has pre-built dashboard JSON files available on their GitHub.
Copy the JSON from the repo, go to the SigNoz UI, and select the import option.
Click Dashboard —-> New Dashboard —---> Import JSONThe dashboard looks like below.
Publish metrics of the main cluster
Now, it’s time to switch to another cluster and publish the metrics of the main cluster.
💡 Note: The SigNoz Otel endpoint is a secure endpoint.
Thus, we need the SSL cert and key of the Otel endpoint.
To get the tls.crt, tls.key decrypt the SigNoz Otel secret. The secretname which we used which issuing cert is “signoz-otel-tls”. Keep the tls.crt, tls.key handy which we need in further steps.
Installing client in cluster-2
Follow the final steps to finish the installation.
Create a new cluster from Argonaut UI.
Click on the
Application +and theFrom Librarybutton.Choose Custom-Apps under configuration.
Enter the following information. The k8s-infra helm chart installs Otel agent, collector deployment.
Namespace:
signoz-client-componentsRelease name:
signozclientChart name:
k8s-infraRepo URL:
https://charts.signoz.io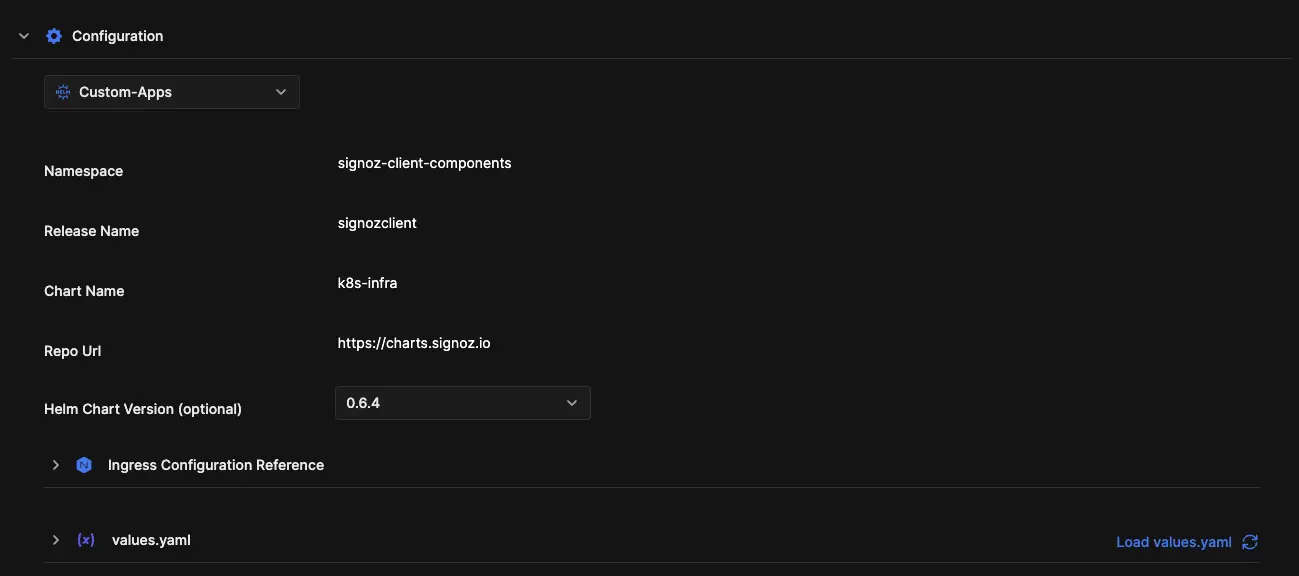
💡 Docs to know more about k8s-infra helm chart.
Load
values.yamland fill in the following information. Replace the DNS Name, certificate, and private key values here with the one for your cluster. Leave the rest of the values as-is.otelCollectorEndpoint: <SIGNOZ_OTEL_DNS_NAME>:443
otelInsecure: false
otelTlsSecrets:
enabled: true
path: /secrets
existingSecretName:
certificate: |
<INCLUDE_CERTIFICATE_HERE>
key: |
<INCLUDE_PRIVATE_KEY_HERE>Click on Install. The SigNoz client is now installed in your cluster in just a few minutes.
Conclusion
You should now be able to see the logs of client cluster and metrics of the client cluster nodes.
Find more info on installing custom apps using helm charts, like setting up Docusaurus in under 5 minutes using Argonaut.